
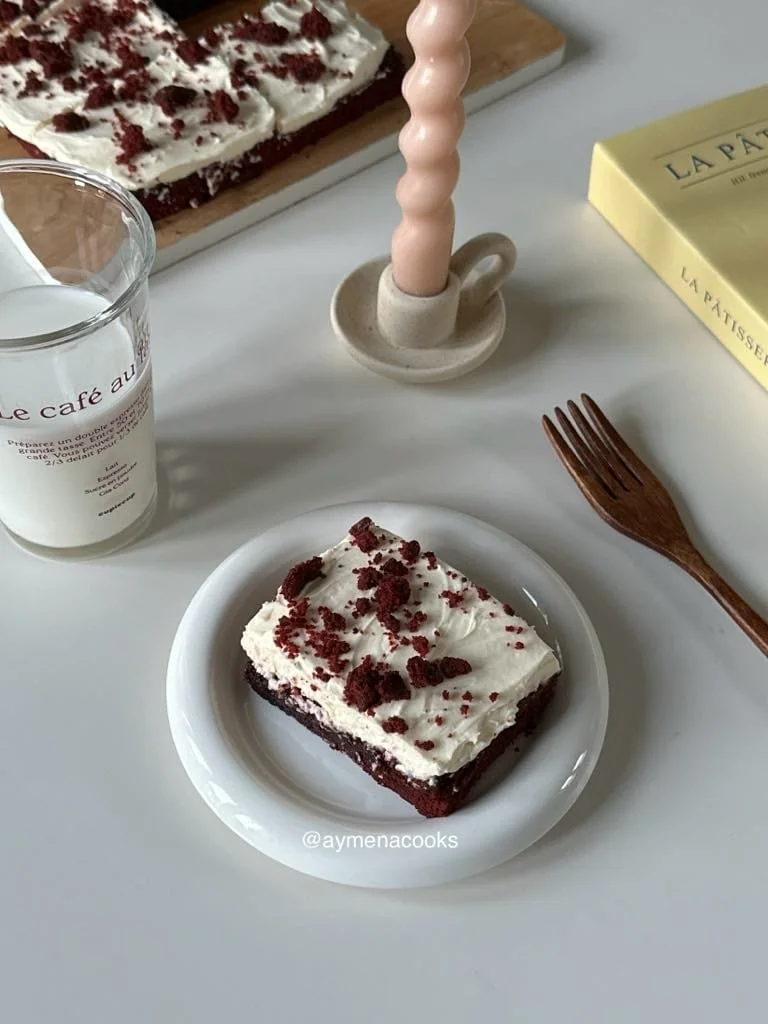
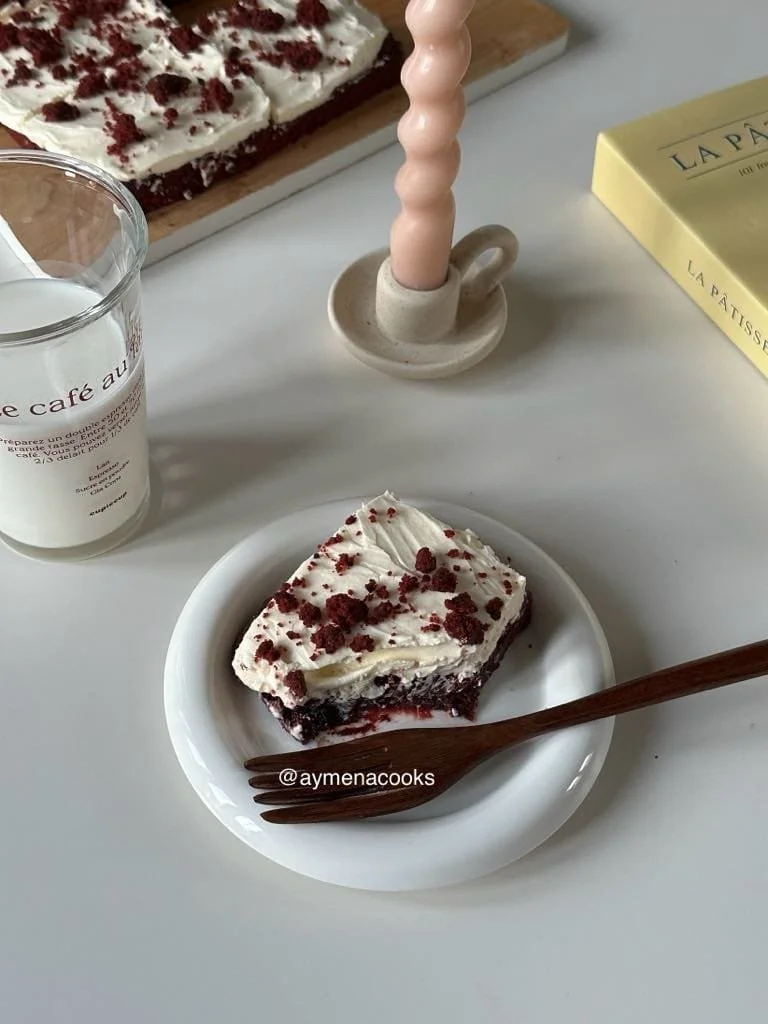
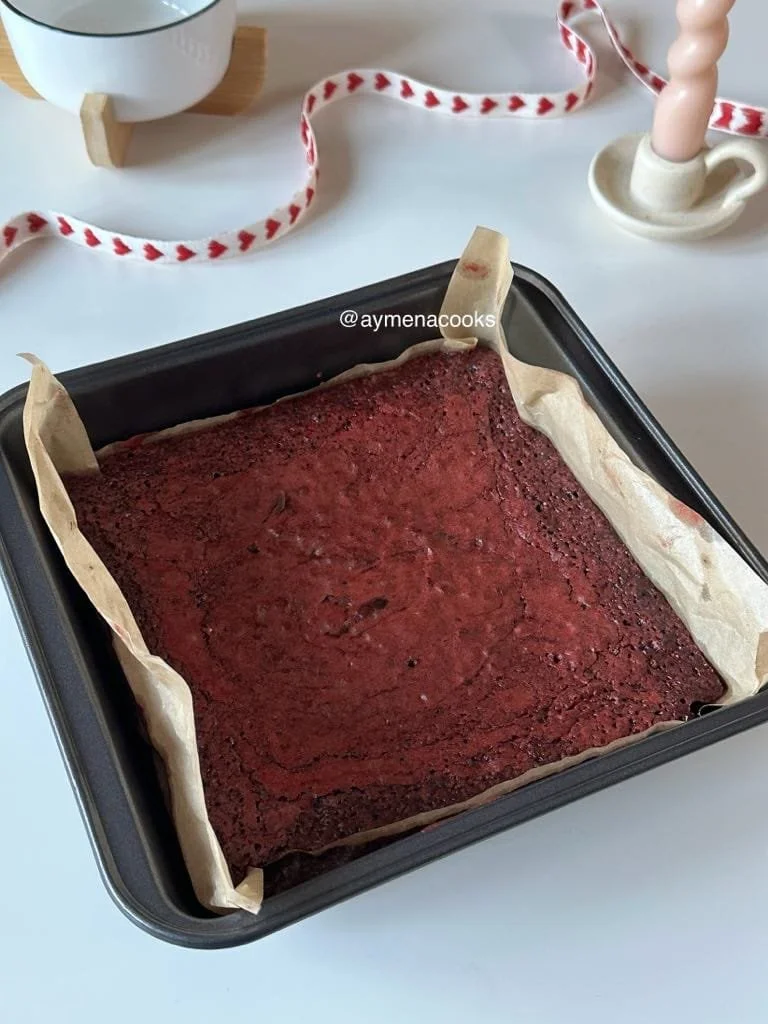
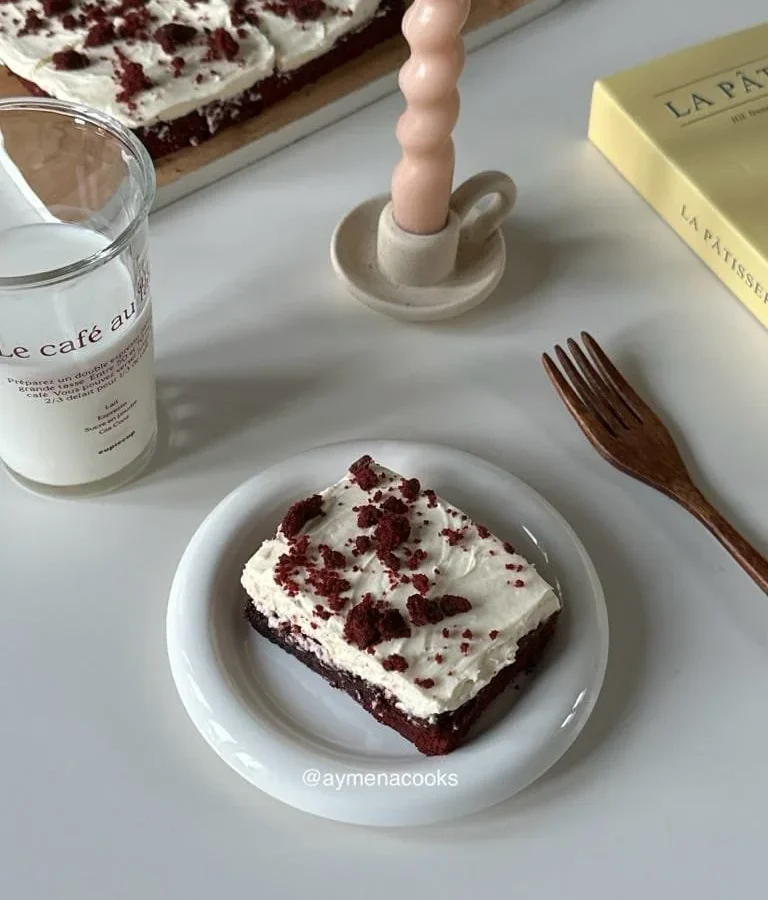
these fudgy, crackly-topped red velvet brownies combine the subtle cocoa notes of classic red velvet with the rich intensity of brownies – the kind of treat that makes you slow down and savour. Topped with clouds of vanilla cream cheese frosting that’s whipped until silky smooth, they’re a little bit elegant, a little bit indulgent, and completely irresistible.
why you will love these red velvet brownies with cream cheese frosting
red velvet cake but make it dense and fudgy – combining red velvet and brownies together gives you the most perfect, moist fudgy texture. dense but still soft and moist. the best part is that these red velvet brownies stay moist and fudgy for days.
whipped cream cheese frosting – i love a whipped cream cheese frosting over a traditional butter based frosting on these red velvet brownies! the frosting is soft and light and airy, which works so well with the dense and rich brownie base.
great for making ahead of time – these red velvet brownies are perfect for making for parties or celebrations or special occasions, especially because you can save some time and make them in advance. make the day before, and then make the frosting fresh and add before serving.
learn how to make these red velvet brownies from scratch
for this homemade red velvet brownies recipe, we’re going to start off by adding butter, granulated sugar and dark brown sugar to a bowl, and heating this up in the microwave in 30 second intervals until the butter melts. once the melted butter and sugars have been mixed together, add eggs and whisk these into the mixture until the sugar dissolves. then, we’ll add some white vinegar, vanilla extract and red food colouring and whisk these in. in another bowl, mix flour, salt and cocoa powder, then add this into the mixture and fold it in until you get your red velvet brownies mix. bake until the red velvet brownies are set on the sides but still soft and fudgy on the inside with a crackly top.
while the red velvet brownies cool, make the whipped cream cheese frosting. beat cream cheese until soft, then add powdered sugar, vanilla extract and heavy cream, and whip until you get a thick, fluffy frosting.
top your cooled red velvet brownies with cream cheese frosting and we’re done!
red velvet brownies ingredients
butter – i use unsalted butter in this red velvet brownies recipe. you are also welcome to use salted butter instead, but you might want to skip the extra salt stated in the recipe. we’re just going to be melting the butter for these brownies.
granulated sugar – this recipe uses a mix of granulated sugar and dark brown sugar. we’ll be mixing the sugar with the melted butter and then whisking in the eggs until the sugar dissolves.
brown sugar – to keep these red velvet brownies chewy and moist, i used a small amount of dark brown soft sugar. you can use light brown sugar or dark brown sugar, bearing in mind that dark brown sugar will have a stronger molasses flavour and make your red velvet brownies darker in colour. if you don’t have brown sugar on hand, you can also just use all granulated sugar, as long as you’re okay with the brownies not being as chewy.
eggs – this red velvet brownies recipe uses 2 large eggs.
white vinegar – adding a small amount of vinegar to the red velvet brownie batter helps give these brownies that classic red velvet tang and also makes these brownies extra soft and fudgy.
vanilla extract – optional, but will add a nice, subtle vanilla flavour to your red velvet brownies and to the cream cheese frosting.
red food colouring – i use a small amount of red food colouring paste to give these brownies their classic red colour. you can increase the amount if you want a stronger red colour. i used a red food colouring paste, and i would recommend using a paste or gel instead of liquid colouring. if using liquid food colouring, you might need to add more than stated in this recipe.
flour – we’ll be using plain flour/all purpose flour for this recipe.
cocoa powder – i’m using natural, unsweetened cocoa powder for these red velvet brownies.
salt – just a small amount of salt will help balance out the sweetness in these red velvet brownies.
cream cheese – you’ll need cream cheese for the whipped cream cheese frosting. make sure it’s room temperature so that it’s easier to work with. i used the firm, block type cream cheese, but you can also use the spreadable type for this.
icing sugar or powdered sugar – we’ll be using this for the frosting to add sweetness
double cream or heavy cream – i personally prefer a whipped cream cheese frosting over a butter based frosting so i’m using heavy cream for this. make sure that it’s cold so that it whips better.
tools:
microwave safe large bowl – we’ll be melting the butter in the microwave and all of the ingredients will be later added to that same bowl, so you’ll want to make sure it’s large enough.
large bowl – you’ll need another large bowl for the cream cheese frosting.
small mixing bowl – we’ll need a small mixing bowl for mixing the dry ingredients before adding them to the large bowl.
whisk or hand mixer – we’re going to mix the eggs in using a whisk or hand mixer until the sugar dissolves. i decided to use a whisk for this recipe. it might take a little longer using a whisk, with a little bit more work and strength, but it will do the job just fine! in fact, using a hand mixer to whip your eggs and sugar actually incorporates more air into the batter, so using a whisk might make your red velvet brownies even more fudgy. we will also need an electric mixer for the cream cheese frosting, but you can also use a whisk for this if you’re okay with it taking a little more time.
silicone spatula or spoon – this will make it easier to gently fold the dry ingredients into the red velvet brownies mix. we want to make sure not to over mix in order to keep these red velvet brownies fudgy and chewy, and using a spoon or spatula will make this easier.
parchment paper or baking paper – lining your baking tray with parchment paper will make it easier to lift the red velvet brownies out once they’re done.
8×8 inch baking dish – i like to use an 8×8 inch dish for this red velvet brownies recipe.
step by step instructions
for full measurements, keep scrolling down to the recipe below.
step one: preheat oven and and grease and line a baking dish for your red velvet brownies.
step two: in a large, microwave-safe bowl, add the unsalted butter, granulated sugar and dark brown sugar. heat this mixture up in the microwave in 30 second intervals, stirring in between each interval. continue to do this until the butter is completely melted.
step three: whisk the melted butter and sugars together until combined. the mixture will look thick and smooth.
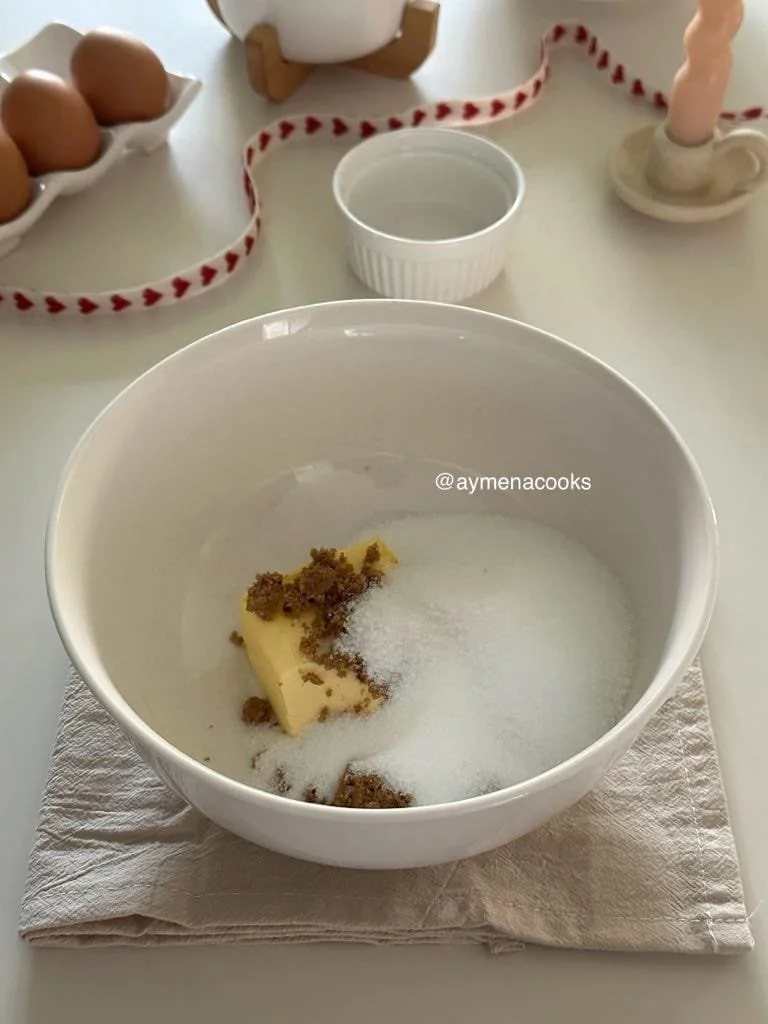
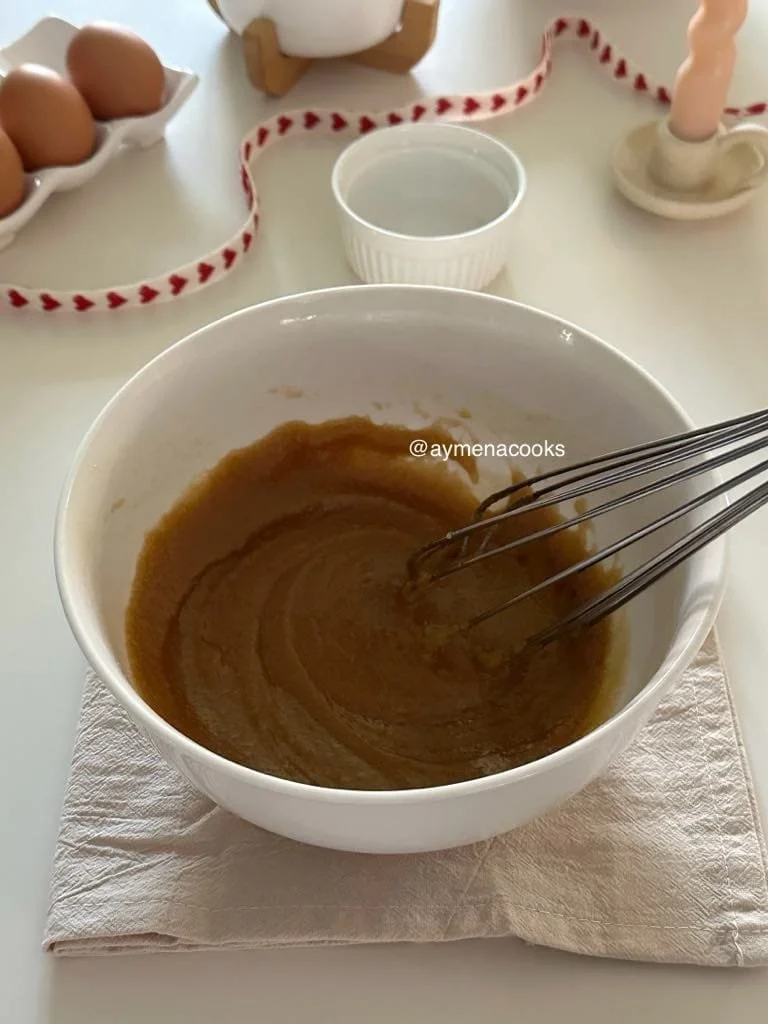
step four: crack 2 eggs into the bowl. use a whisk or electric mixer to whip the eggs with the butter and sugar until the mixture increases in volume and looks almost frothy. stop when you can feel that the sugar has dissolved. you’ll know the sugar has dissolved once you feel a little bit of the mixture between your fingers and you can no longer feel the sugar granules. if you find that you can still feel them, go ahead and mix for a little bit longer.
step five: add vanilla, white vinegar and red food colour to the egg and sugar mixture and whisk it in.
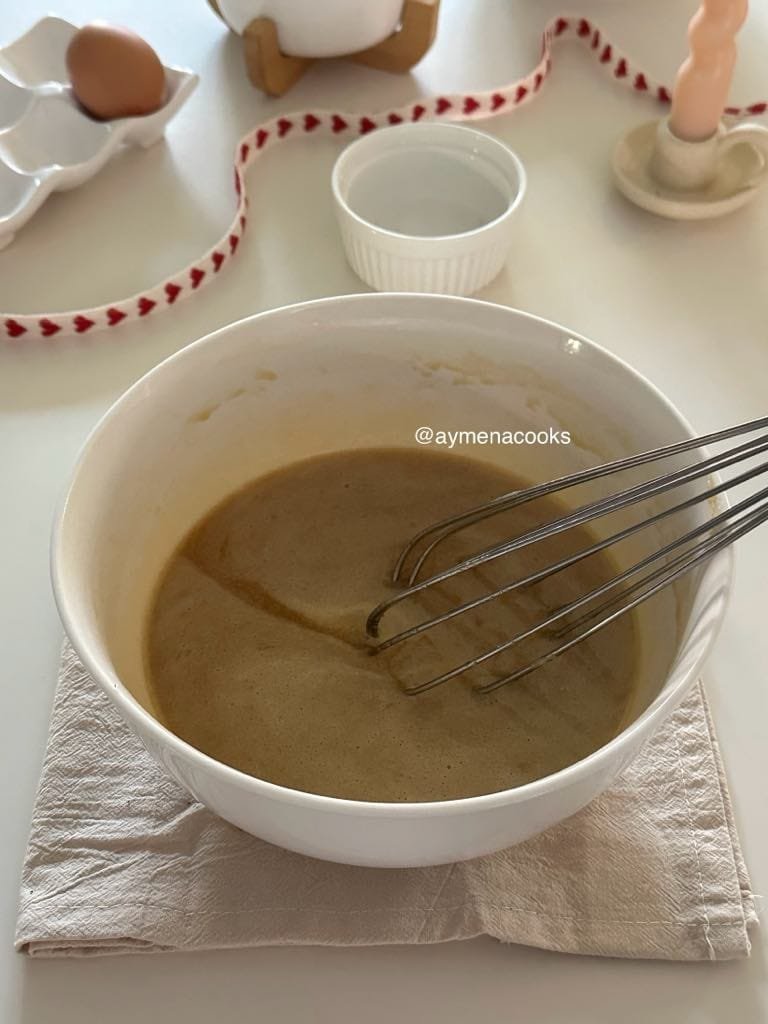
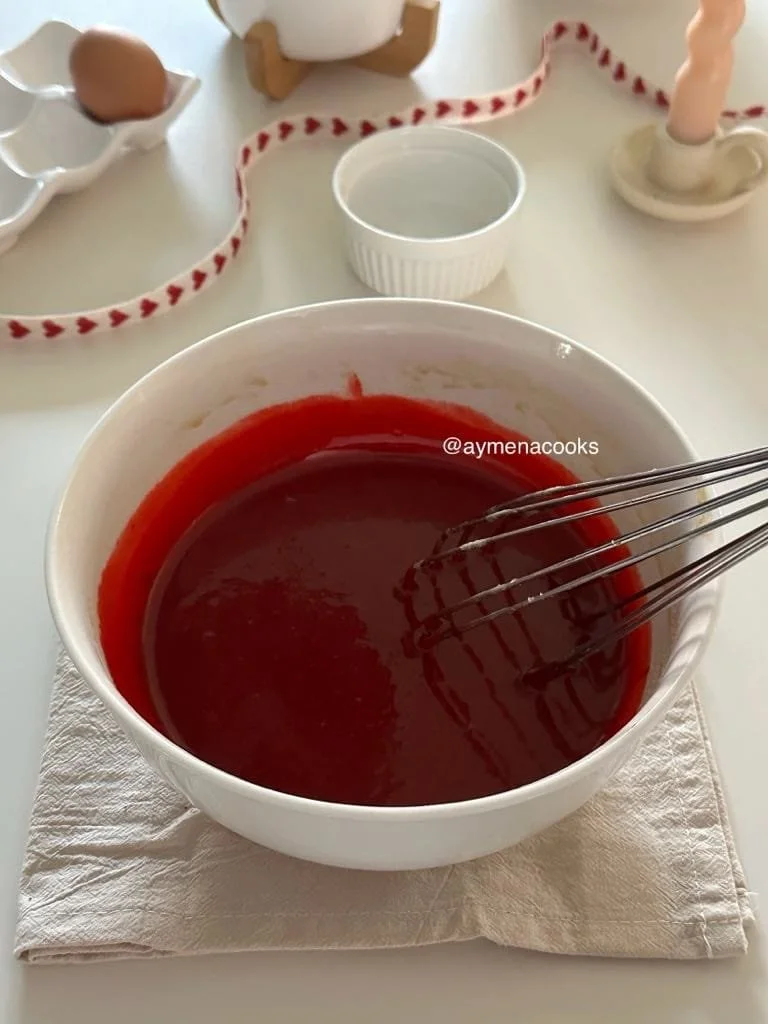
step six: in another small bowl, add flour, cocoa powder and salt and mix these together. add this to the red velvet brownie mix and then, using a spoon or spatula, gently fold the dry ingredients in. do not mix too much at this stage as you don’t want to over mix. mix them in until just combined, and the dry ingredients are no longer visible.
step seven: add the red velvet brownie batter to your lined baking dish in a smooth and even layer, then place in the oven and bake for 20-25 minutes (baking times will vary depending on your oven and the size of your tray).
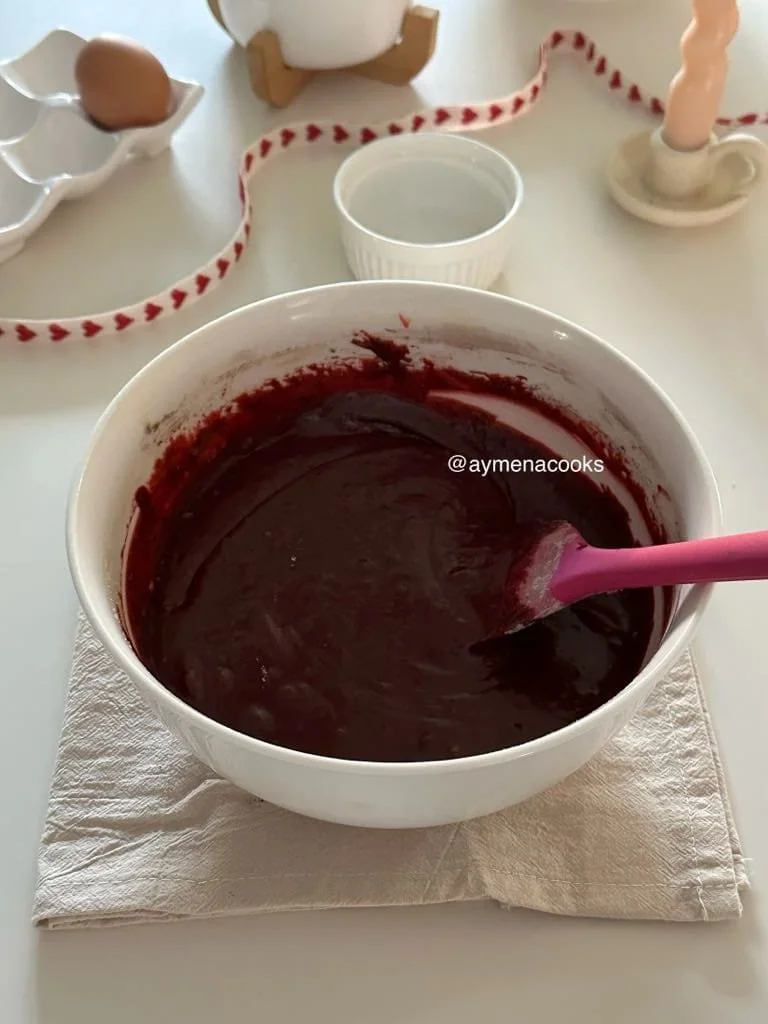
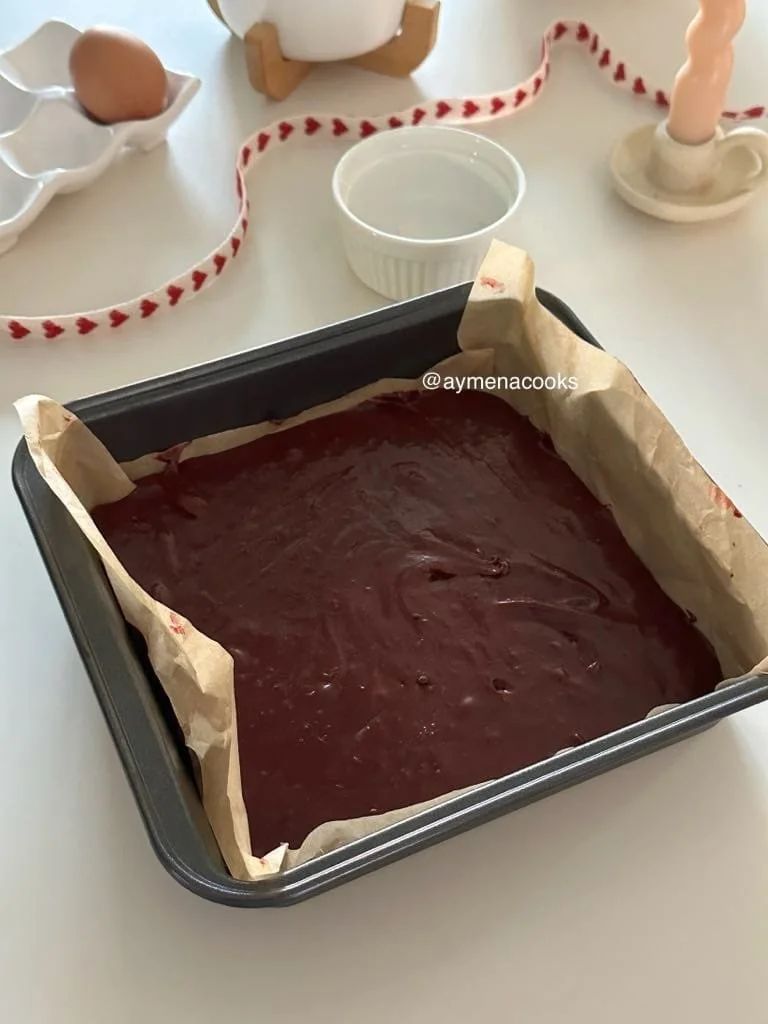
step eight: once you remove the red velvet brownies from the oven, let them cool completely at room temperature before adding the cream cheese frosting. they will be quite soft and gooey straight out of the oven, and will continue to cook as they cool in the tray.
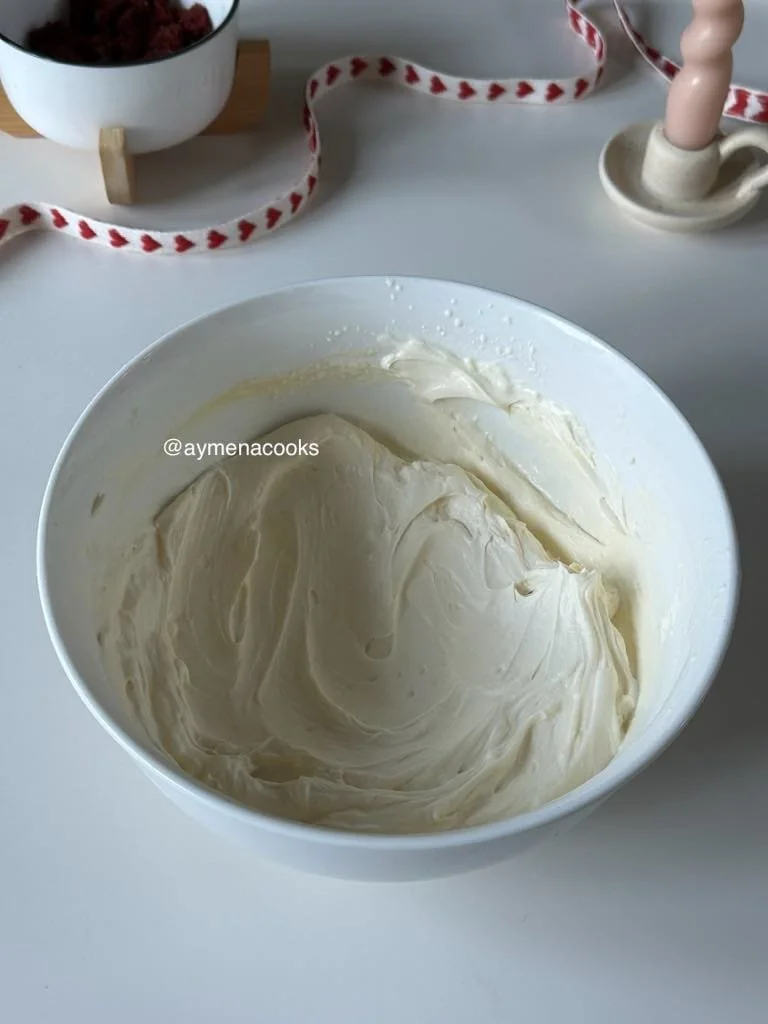
step nine: while the red velvet brownies are cooling, make the whipped cream cheese frosting. add room temperature cream cheese to a large bowl, and beat it with a whisk or electric mixer until soft and creamy.
step ten: add the icing sugar/powdered sugar to the cream cheese, and beat these together until combined and smooth. add some vanilla extract and stir that through.
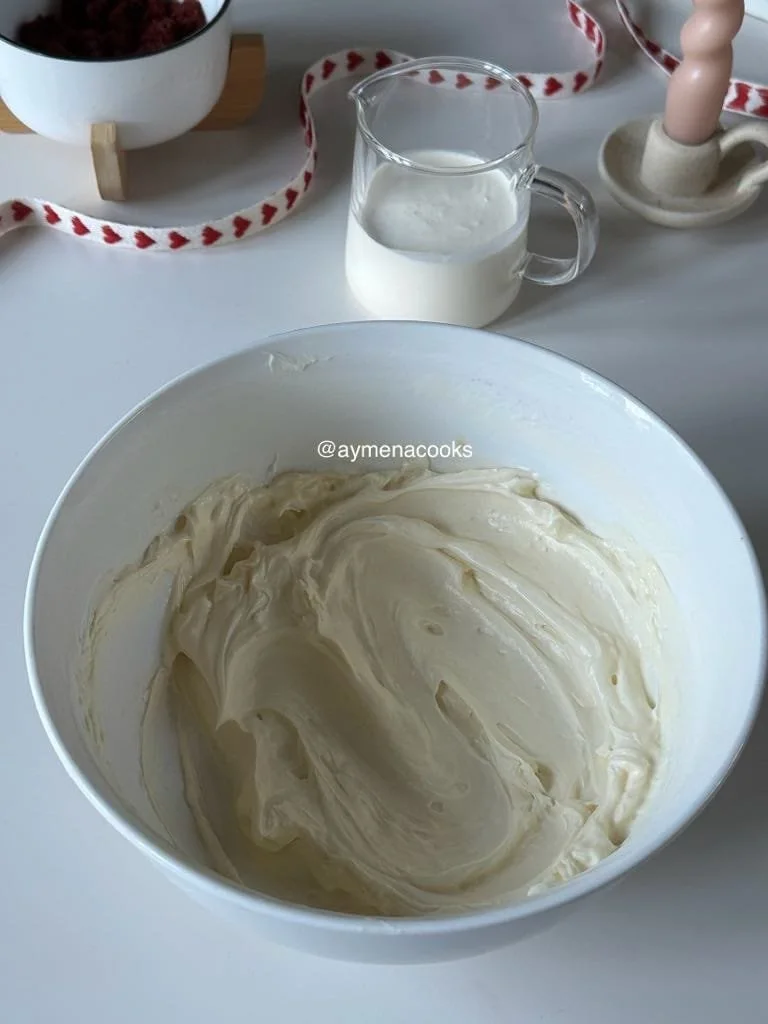
step eleven: pour cold heavy cream into the bowl, and whip that into the cream cheese mixture until combined, and you get a smooth and fluffy cream cheese frosting.
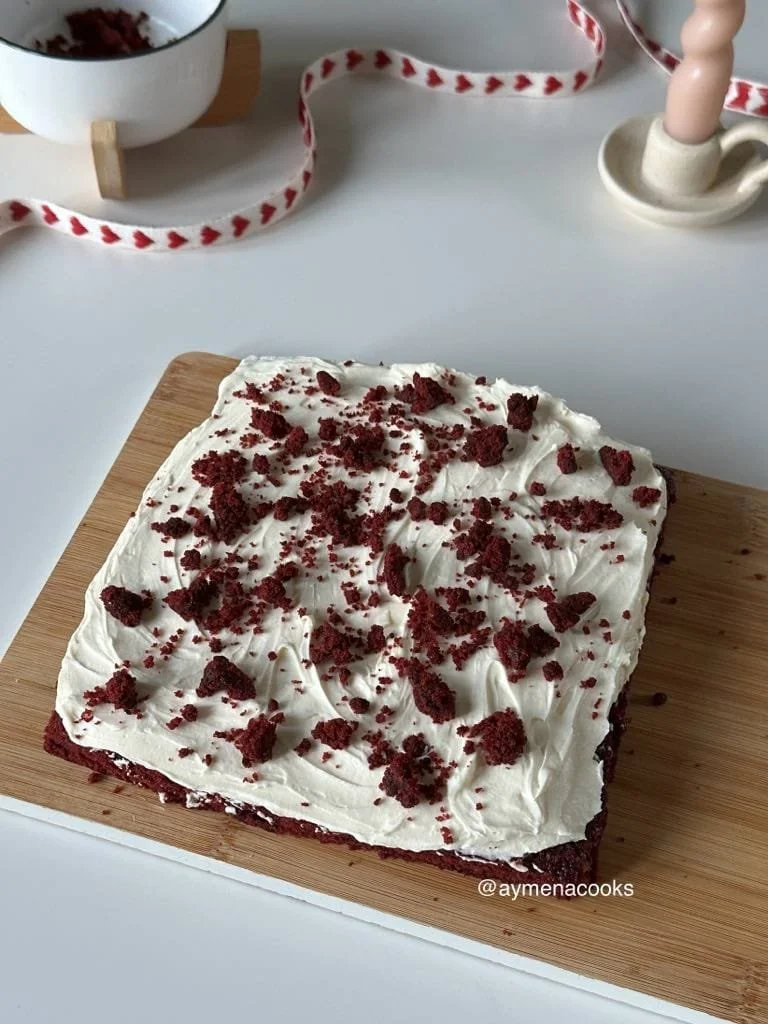
step twelve: once the red velvet brownies have cooled completely, lift them out of the baking dish, and use a knife to slice a thin chunk of the edge off. we’re going to crumble this up and use this as a topping for our red velvet brownies.
step thirteen: top the cooled red velvet brownies with a thick layer of the whipped cream cheese frosting and smooth out into an even layer.
step fourteen: top with the extra red velvet brownie crumbs.
step fifteen: slice up, and let’s eat!
tips and notes
heat the butter and sugars together in the mixture in short bursts rather than all at once for a longer amount of time. heating the butter for too long at a high heat can make it explode in the microwave, so you want to stir the mixture every 30 seconds. i’m heating the butter and sugar together so that it’s easier for the sugar to dissolve.
be careful not to over mix the red velvet brownie batter. once you add the flour and the rest of the dry ingredients, make sure to gently fold it in using a spoon or silicone spatula, and don’t mix for longer than necessary. over mixing can lead to tough brownies.
if using salted butter instead of unsalted, i would recommend skipping the extra 1/4 tsp of salt stated in this recipe.
make sure to use room temperature eggs, as they will combine with the rest of the ingredients easily and give you a smoother batter.
feel free to add white chocolate or even milk or dark chocolate to your red velvet brownies. you can just fold these into the batter after adding the dry ingredients. i thought the extra chocolate wasn’t necessary due to the cream cheese frosting already being sweet, but it’s entirely up to you. you can even make these red velvet brownies without cream cheese frosting and just add chocolate to your red velvet brownies if you like.
if you find the red velvet brownies too sweet, i would recommend increasing the salt instead of reducing the sugar as the amount of sugar has an impact on the texture of these red velvet brownies.
for the best colour, use gel or paste food colouring as you won’t need as much, and it won’t affect the texture of these red velvet brownies in the way adding liquid would. feel free to increase the amount of food colouring gradually depending on what kind of shade you’d like your red velvet brownies to have.
make sure you preheat the oven so that it’s already hot by the time you place your red velvet brownies in the oven. this will ensure that the red velvet brownies bake evenly and that they won’t take longer to bake.
i would recommend using a metal baking pan over a glass or ceramic baking dish as this can affect the baking times. glass heats up more slowly, but retains heat longer so your brownies might take longer to bake, and the edges might cook faster than the centre. use a metal baking pan for more even baking.
adjust baking time as needed. every oven is different, so i recommend keeping an eye on your red velvet brownies as they bake. don’t just bang them in the oven and leave until the designated time is up. it might be a good idea to check the red velvet brownies for doneness a few minutes before the recommended baking time. A toothpick inserted into the center should come out with a few moist crumbs attached – the toothpick shouldn’t be completely dry or have wet batter on it. i like to take the red velvet brownies out of the oven when they’re very slightly underdone as they will continue to cook as they cool once they’re out of the oven. over baking will result in dry and cakey brownies, which is not what we want. i ended up baking these red velvet brownies for a total of 22 minutes.
once your red velvet brownies are out of the oven, they should be too soft to pick up or slice. let them cool slightly at room temperature before frosting them or trying to slice them or pick them up.
use a kitchen scale to measure your ingredients. while i add both metric and cup measurements for this recipe, i always recommend using a kitchen scale to weigh out your ingredients for most accurate results.
if using cups, bear in mind that the cup measurements written for this recipe are based on scooping the flour (as this is what most people tend to do), so they might seem higher than typical flour cup measurements.
storage instructions: store any leftover red velvet brownies in an airtight container at room temperature or in the fridge. if frosted, store in the fridge, if unfrosted store at room temperature.
if storing in the fridge, let the red velvet brownies come to room temperature before serving.
frequently asked questions
what do red velvet brownies taste like ? are red velvet brownies good ?
– i personally think that these moist red velvet brownies combine the best of both worlds – a fudgy brownie texture with that subtle cocoa flavour and the slight tanginess of red velvet. they’re richer than a red velvet cake, but not as intensely chocolatey as regular brownies.
my red velvet brownies aren’t red enough – what do i do ?
– if your red velvet brownies aren’t quite as red as you would like, just gradually increase the amount of gel or paste colouring in the batter until it reaches your desired shade of red. liquid colouring can affect the texture of your brownies, and isn’t as strong, so i would recommend sticking to gel or paste.
can i make these red velvet brownies without food colouring ?
– yes, you can. they’ll just be more of a chocolate-brown colour.
can i use salted butter in this red velvet brownie recipe ?
– yes, you can use salted butter. if you use salted butter for your brownies instead of unsalted, i would recommend just skipping the extra 1/4 tsp of salt stated in the recipe.
do i have to use vanilla extract to make these red velvet brownies ?
– the vanilla extract in this red velvet brownies recipe is optional. i like the subtle vanilla flavour it gives to the red velvet brownies and the cream cheese frosting, but if you would prefer not to use it or don’t have it, that’s also completely fine.
can i make these red velvet brownies with white chocolate ?
– you can absolutely add some extra white chocolate to the brownie batter if you’d like to make these red velvet brownies with white chocolate.
why did my red velvet brownies turn into a cake instead of fudgy ?
– there are a number of reasons why your red velvet brownies came out cakey. one reason is baking times. you should take your red velvet brownies out of the oven while they are slightly underbaked as they will continue to cook and firm up as they cool. even if you followed the exact timings in the recipe, every oven will bake things differently so timings will vary depending on your oven and the size of your tray. i highly recommend checking on your red velvet brownies every once in a while, especially towards the end of the written times to make sure they don’t over bake.
– another reason could be due to over mixing the batter or having too much flour in your red velvet brownie batter. to make these red velvet brownies as accurately as possible, i would really recommend weighing out the dry ingredients using a kitchen scale. gently fold them into the brownie batter until no streaks remain in order to avoid over mixing.
can i make these red velvet brownies without vinegar ?
– this red velvet brownies recipe uses vinegar to get that moist, fudgy texture and also add a slight tang like in a classic red velvet cake. you can skip it if you like, but i would really recommend adding it.
do i have to use brown sugar to make these red velvet brownies ?
– i use a small amount of dark brown sugar in these gooey red velvet brownies, as it helps make them extra chewy and fudgy and adds a subtle molasses flavour that complements the brownies really well. you can use light brown sugar or dark brown sugar. however, if you don’t have brown sugar, you can substitute it with granulated sugar. using all granulated sugar for this brownie recipe might change the taste and texture of these red velvet brownies slightly, but they will still be delicious! for best results, use a combination of brown sugar and granulated sugar as stated.
why do my red velvet brownies not have a crackly top ?
– to get a crackly top on your red velvet brownies, you need to make sure that your sugar dissolves when you beat the eggs and sugar together. to do this, we need to beat the eggs and sugar for a good few minutes using a whisk or hand mixer. the mixture should become slightly thicker and paler, and look almost frothy. if you’re unsure, you can feel the mixture between your fingers – if you can still feel the sugar granules, you need to mix for longer until you can no longer feel them!
how do i know that my red velvet brownies are done baking ?
– Insert a toothpick into the center of the red velvet brownies a few minutes before the end of the stated baking times. if the toothpick comes out with a few moist crumbs attached, the brownies are done. Be careful not to over bake, as this can lead to dry, cakey brownies. the toothpick shouldn’t be completely dry, and it shouldn’t have wet batter on it either. if your toothpick comes out with wet batter on it, it’ll need to bake for slightly longer.
can i double the recipe for these red velvet brownies ?
– yes, you can! if you do double the recipe, i would recommend baking the brownies in a bigger pan e.g. a 9×13 pan. you might also need to increase baking times, so make sure to keep an eye on your red velvet brownies when they’re in the oven.
can i make these red velvet brownies ahead of time ?
– yes, you can. you can bake the red velvet brownies the day before serving as they’ll need to cool completely before you add any frosting on any way. frost the red velvet brownies just before serving.
can i make red velvet brownies from box brownie mix ?
– while i would recommend making these red velvet brownies homemade and from scratch for the best flavour and texture, you can probably make these red velvet brownies from brownie mix if you want to keep these red velvet brownies easy and quick.
can i make red velvet heart brownies or red velvet mini brownies ?
– absolutely! you can use a heart-shaped pan for red velver heart brownies, or cut the brownies into heart shapes once they’re out of the oven and have cooled completely. for easy red velvet brownie bites, just slice your red velvet brownies into smaller, bitesized pieces. you can also coat them in milk chocolate or white chocolate once they’re cool.
can i make red velvet brownies with oil ?
– you can make red velvet brownies with oil, but i would recommend using butter for better flavour. or you can use a mix of oil and butter.
can i make these red velvet brownies with a cream cheese swirl instead of a frosting ?
– you can absolutely make red velvet brownies with a cheesecake swirl instead of the frosting. just skip the frosting, make a simple cheesecake mix, and swirl it into the red velvet brownie batter before baking.
what other red velvet brownie icing would work instead of a cream cheese frosting ?
– some other options instead of a whipped cream cheese frosting that would work really well with these red velvet brownies are a vanilla buttercream, a white chocolate ganache or even a simple powdered sugar glaze.
can you make red velvet brownies with cake mix ?
– you can, but for the best texture and flavour, i would really recommend making these red velvet brownies from scratch!
can i freeze these red velvet brownies ?
– you can freeze the unfrosted red velvet brownies for up to 3 months. the frosting is best made fresh and added to the red velvet brownies before serving.
recipe
For a classic chocolate version, try my fudgy brown butter brownies.
red velvet brownies with cream cheese frosting
these fudgy, crackly-topped red velvet brownies combine the subtle cocoa notes of classic red velvet with the rich intensity of brownies - the kind of treat that makes you slow down and savour. Topped with clouds of vanilla cream cheese frosting that's whipped until silky smooth, they're a little bit elegant, a little bit indulgent, and completely irresistible.
- 25 minprep
- 25 mincook
- total
- 6servings
ingredients
14 ingredientsred velvet brownies
- 120g butter, unsalted (1/2 cup + 1 tbsp)
- 150g granulated sugar (1/2 cup + 3 tbsps)
- 50g dark brown sugar (1/4 cup, packed)
- 2 large eggs, room temperature
- 1 tsp vanilla extract
- 1/2 tsp white vinegar
- 1 tsp red gel or paste food colouring
- 95g plain or all purpose flour (1/2 cup + 1 tbsp)
- 20g natural unsweetened cocoa powder (3 tbsps)
- 1/4 tsp salt
whipped cream cheese frosting
- 200g cream cheese, room temperature (3/4 cup + 2 tbsps)
- 50g icing sugar or powdered sugar (1/4 cup + 1 tbsp)
- 1 tsp vanilla extract
- 150ml double cream or heavy cream (1/2 cup + 2 tbsps)
method
16 steps- preheat oven to 180°C (350°F) and grease and line an 8x8 inch metal baking dish. make sure that some of the baking paper/parchment paper hangs over the edge so that you are able to easily lift the red velvet brownies out of the pan once they're done.
- in a large, microwave-safe bowl, add the unsalted butter, granulated sugar and dark brown sugar. heat this mixture up in the microwave in 30 second intervals, stirring in between each interval. continue to do this until the butter is completely melted.
- whisk the melted butter and sugars together until combined. the mixture will look thick and smooth.
- add 2 eggs to the same bowl. use a whisk or hand mixer to mix the eggs together for 3-4 minutes or until you can feel that the sugar has dissolved. the egg and sugar mixture should look slightly paler in colour, increase in volume and look almost frothy.
- add the vanilla extract, white vinegar and red food colouring to the egg and sugar mixture and whisk it in.
- in another small bowl, add flour, cocoa powder and salt and mix these together. add this to the red velvet brownie mix and then, using a spoon or spatula, gently fold the dry ingredients in. do not mix too much at this stage as you don't want to over mix. mix them in until just combined, and the dry ingredients are no longer visible.
- add the red velvet brownie batter to your lined baking dish in a smooth and even layer.
- bake at 180°C (350°F) for 20-25 minutes, or until a toothpick in the centre of the brownies comes out with a few moist crumbs attached to it.
- remove the red velvet brownies from the oven, and let them cool completely at room temperature. they will continue to cook as they cool in the tray.
- make the cream cheese frosting while the brownies cool. in a large bowl, add cream cheese. beat the cream cheese on its own until soft and smooth.
- add the powdered sugar and beat it into the cream cheese until combined. then, add vanilla extract and stir that through the mixture.
- pour cold heavy cream into the bowl, and whip the mixture until combined. it should look like a soft and fluffy cream cheese frosting.
- once the red velvet brownies have cooled completely, lift them out of the baking dish, and use a knife to slice a thin chunk of the edges off. we're going to crumble this up and use this as a topping for our red velvet brownies.
- top the cooled red velvet brownies with a thick layer of the whipped cream cheese frosting and smooth out into an even layer.
- top with the extra red velvet brownie crumbs we saved.
- slice up, and let's eat!
notes
- check the red velvet brownies for doneness a few minutes before the recommended baking time. a toothpick inserted into the centre should come out with a few moist crumbs attached to it - the toothpick shouldn't be completely dry or have wet batter on it. remember that baking times will depend on your oven and the size of your tray.
- if using salted butter instead of unsalted, skip the extra salt in the recipe.
- adjust the amount of food colouring in the recipe depending on your desired shade of red for these red velvet brownies.
- make sure the brownies cool completely before you frost them.
tools
7 tools- microwave safe large bowl - we'll be melting the butter in the microwave and all of the ingredients will be later added to that same bowl, so you'll want to make sure it's large enough.
- large bowl - you'll need another large bowl for the cream cheese frosting.
- small mixing bowl - we'll need a small mixing bowl for mixing the dry ingredients before adding them to the large bowl.
- whisk or hand mixer - we're going to mix the eggs in using a whisk or hand mixer until the sugar dissolves. i decided to use a whisk for this recipe. it might take a little longer using a whisk, with a little bit more work and strength, but it will do the job just fine! in fact, using a hand mixer to whip your eggs and sugar actually incorporates more air into the batter, so using a whisk might make your red velvet brownies even more fudgy. we will also need an electric mixer for the cream cheese frosting, but you can also use a whisk for this if you're okay with it taking a little more time.
- silicone spatula or spoon - this will make it easier to gently fold the dry ingredients into the red velvet brownies mix. we want to make sure not to over mix in order to keep these red velvet brownies fudgy and chewy, and using a spoon or spatula will make this easier.
- parchment paper or baking paper - lining your baking tray with parchment paper will make it easier to lift the red velvet brownies out once they're done.
- 8x8 inch baking dish - i like to use an 8x8 inch dish for this red velvet brownies recipe.
comments
Questions, tips, and kind notes are welcome.