
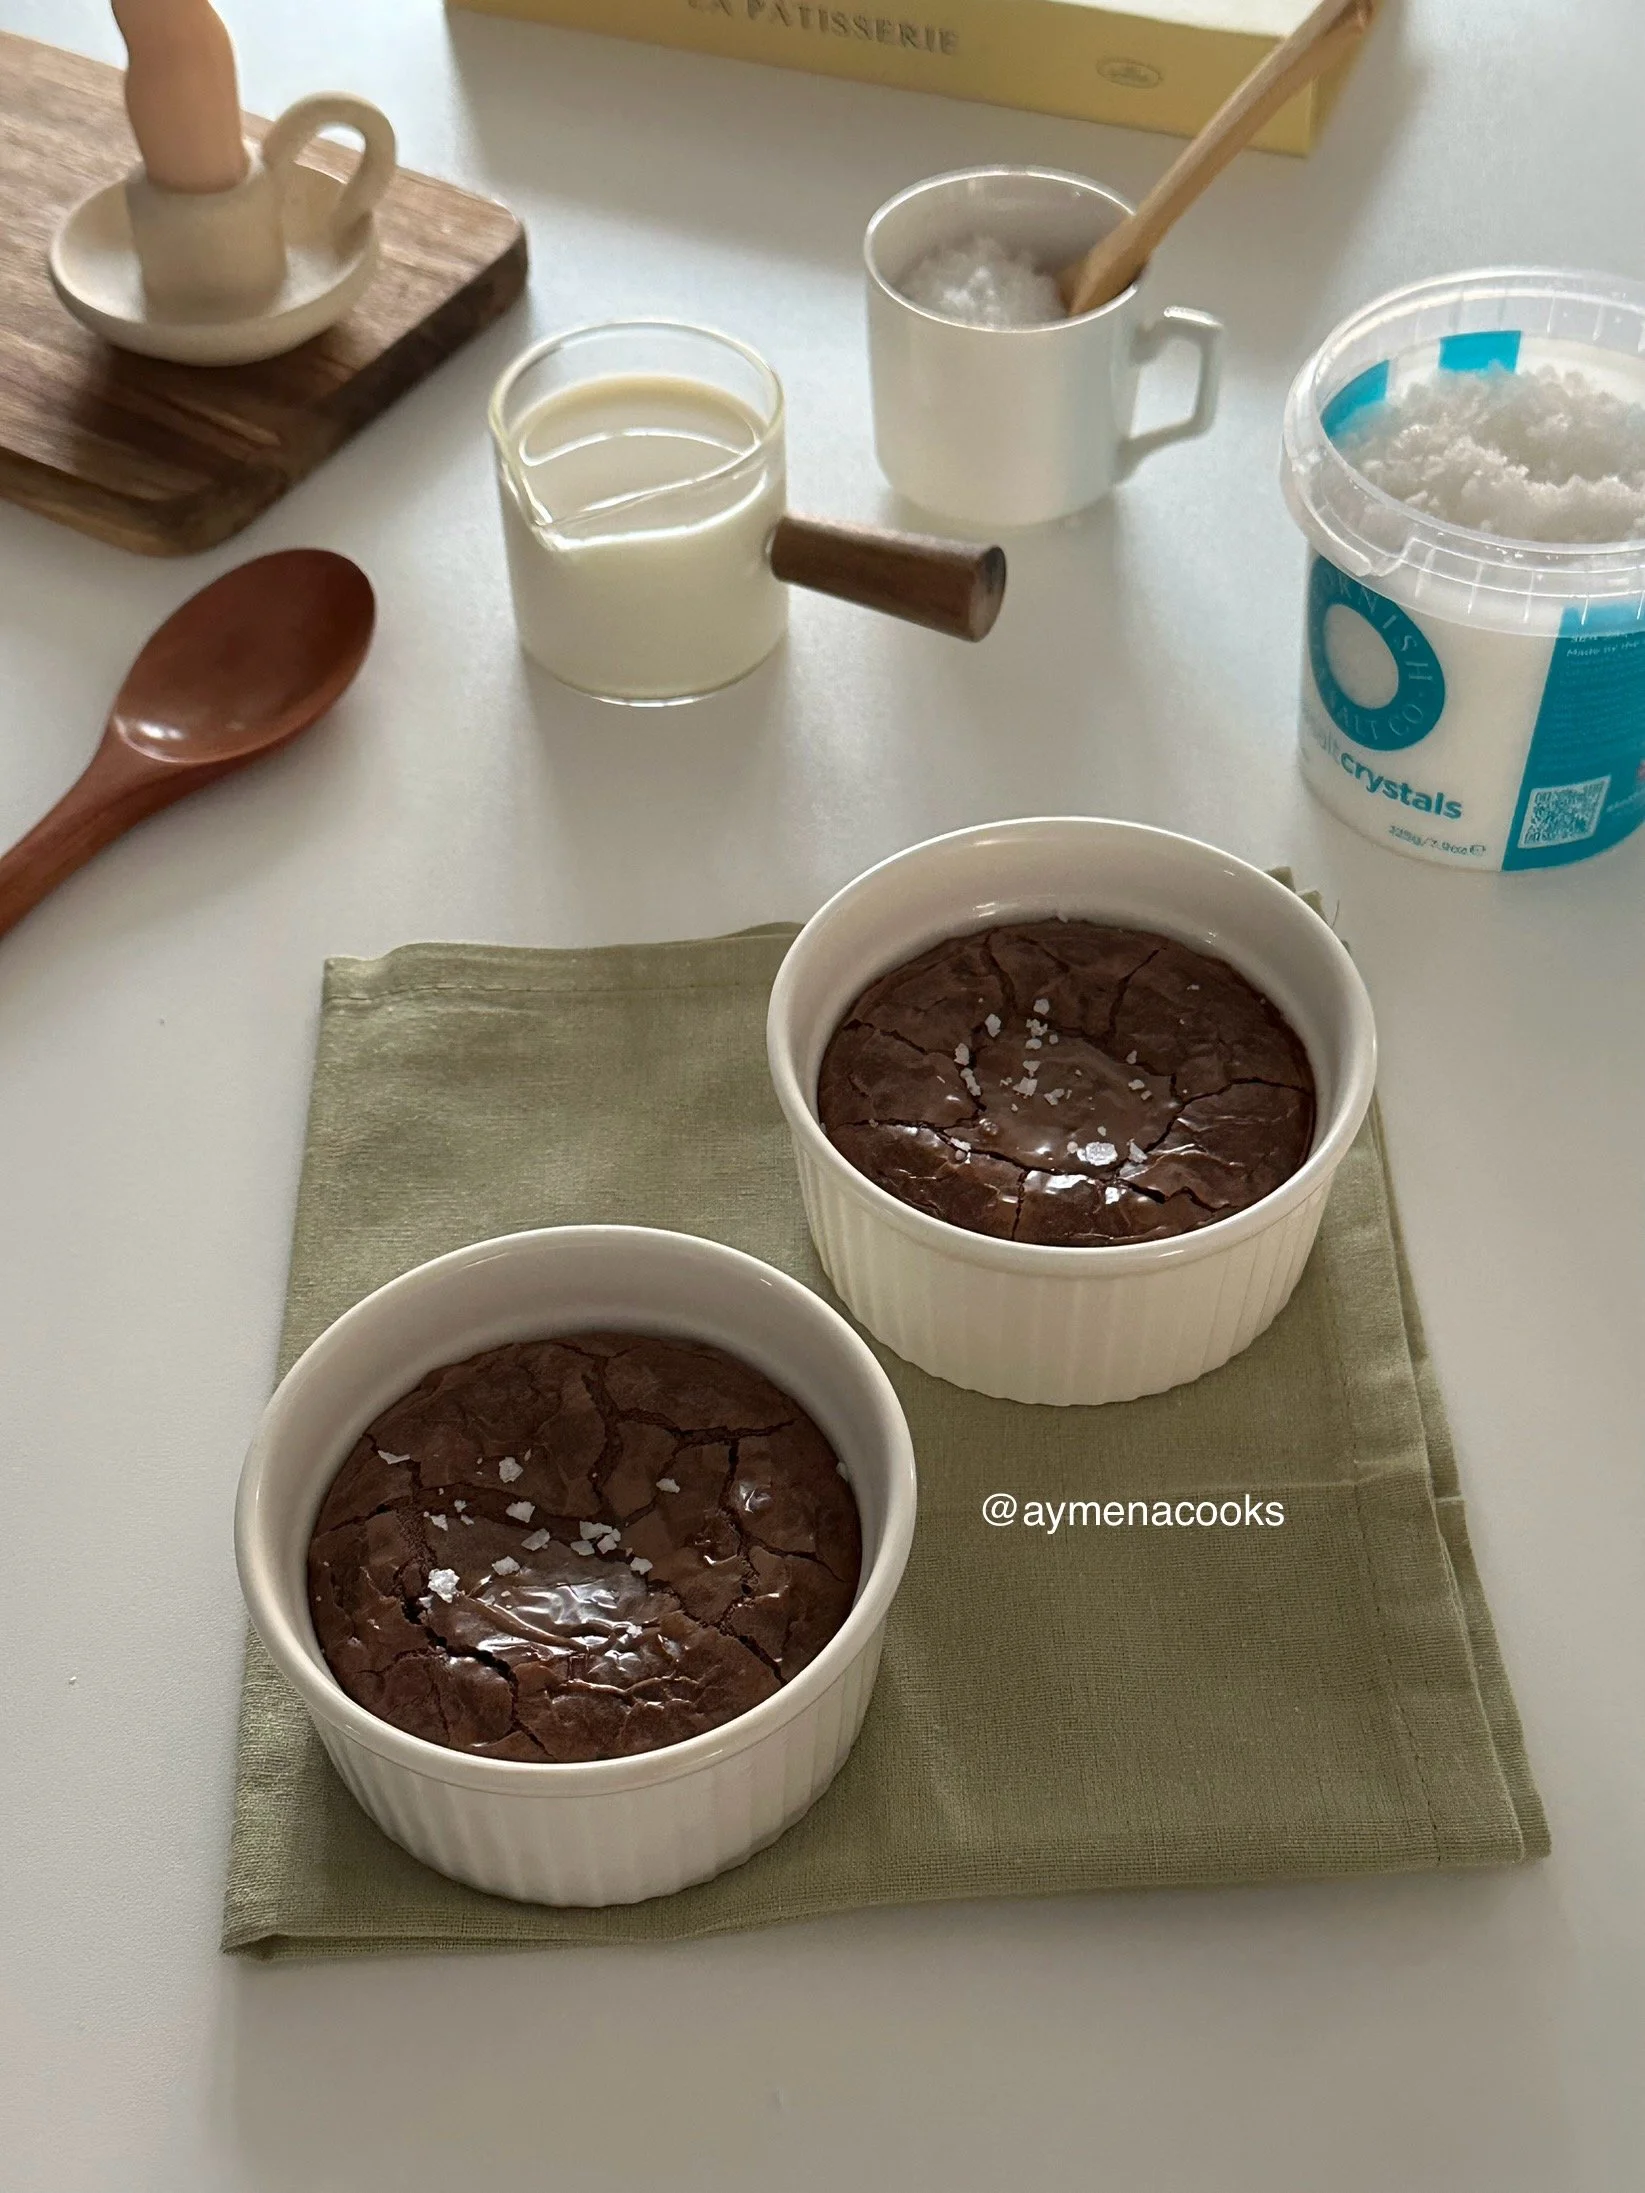

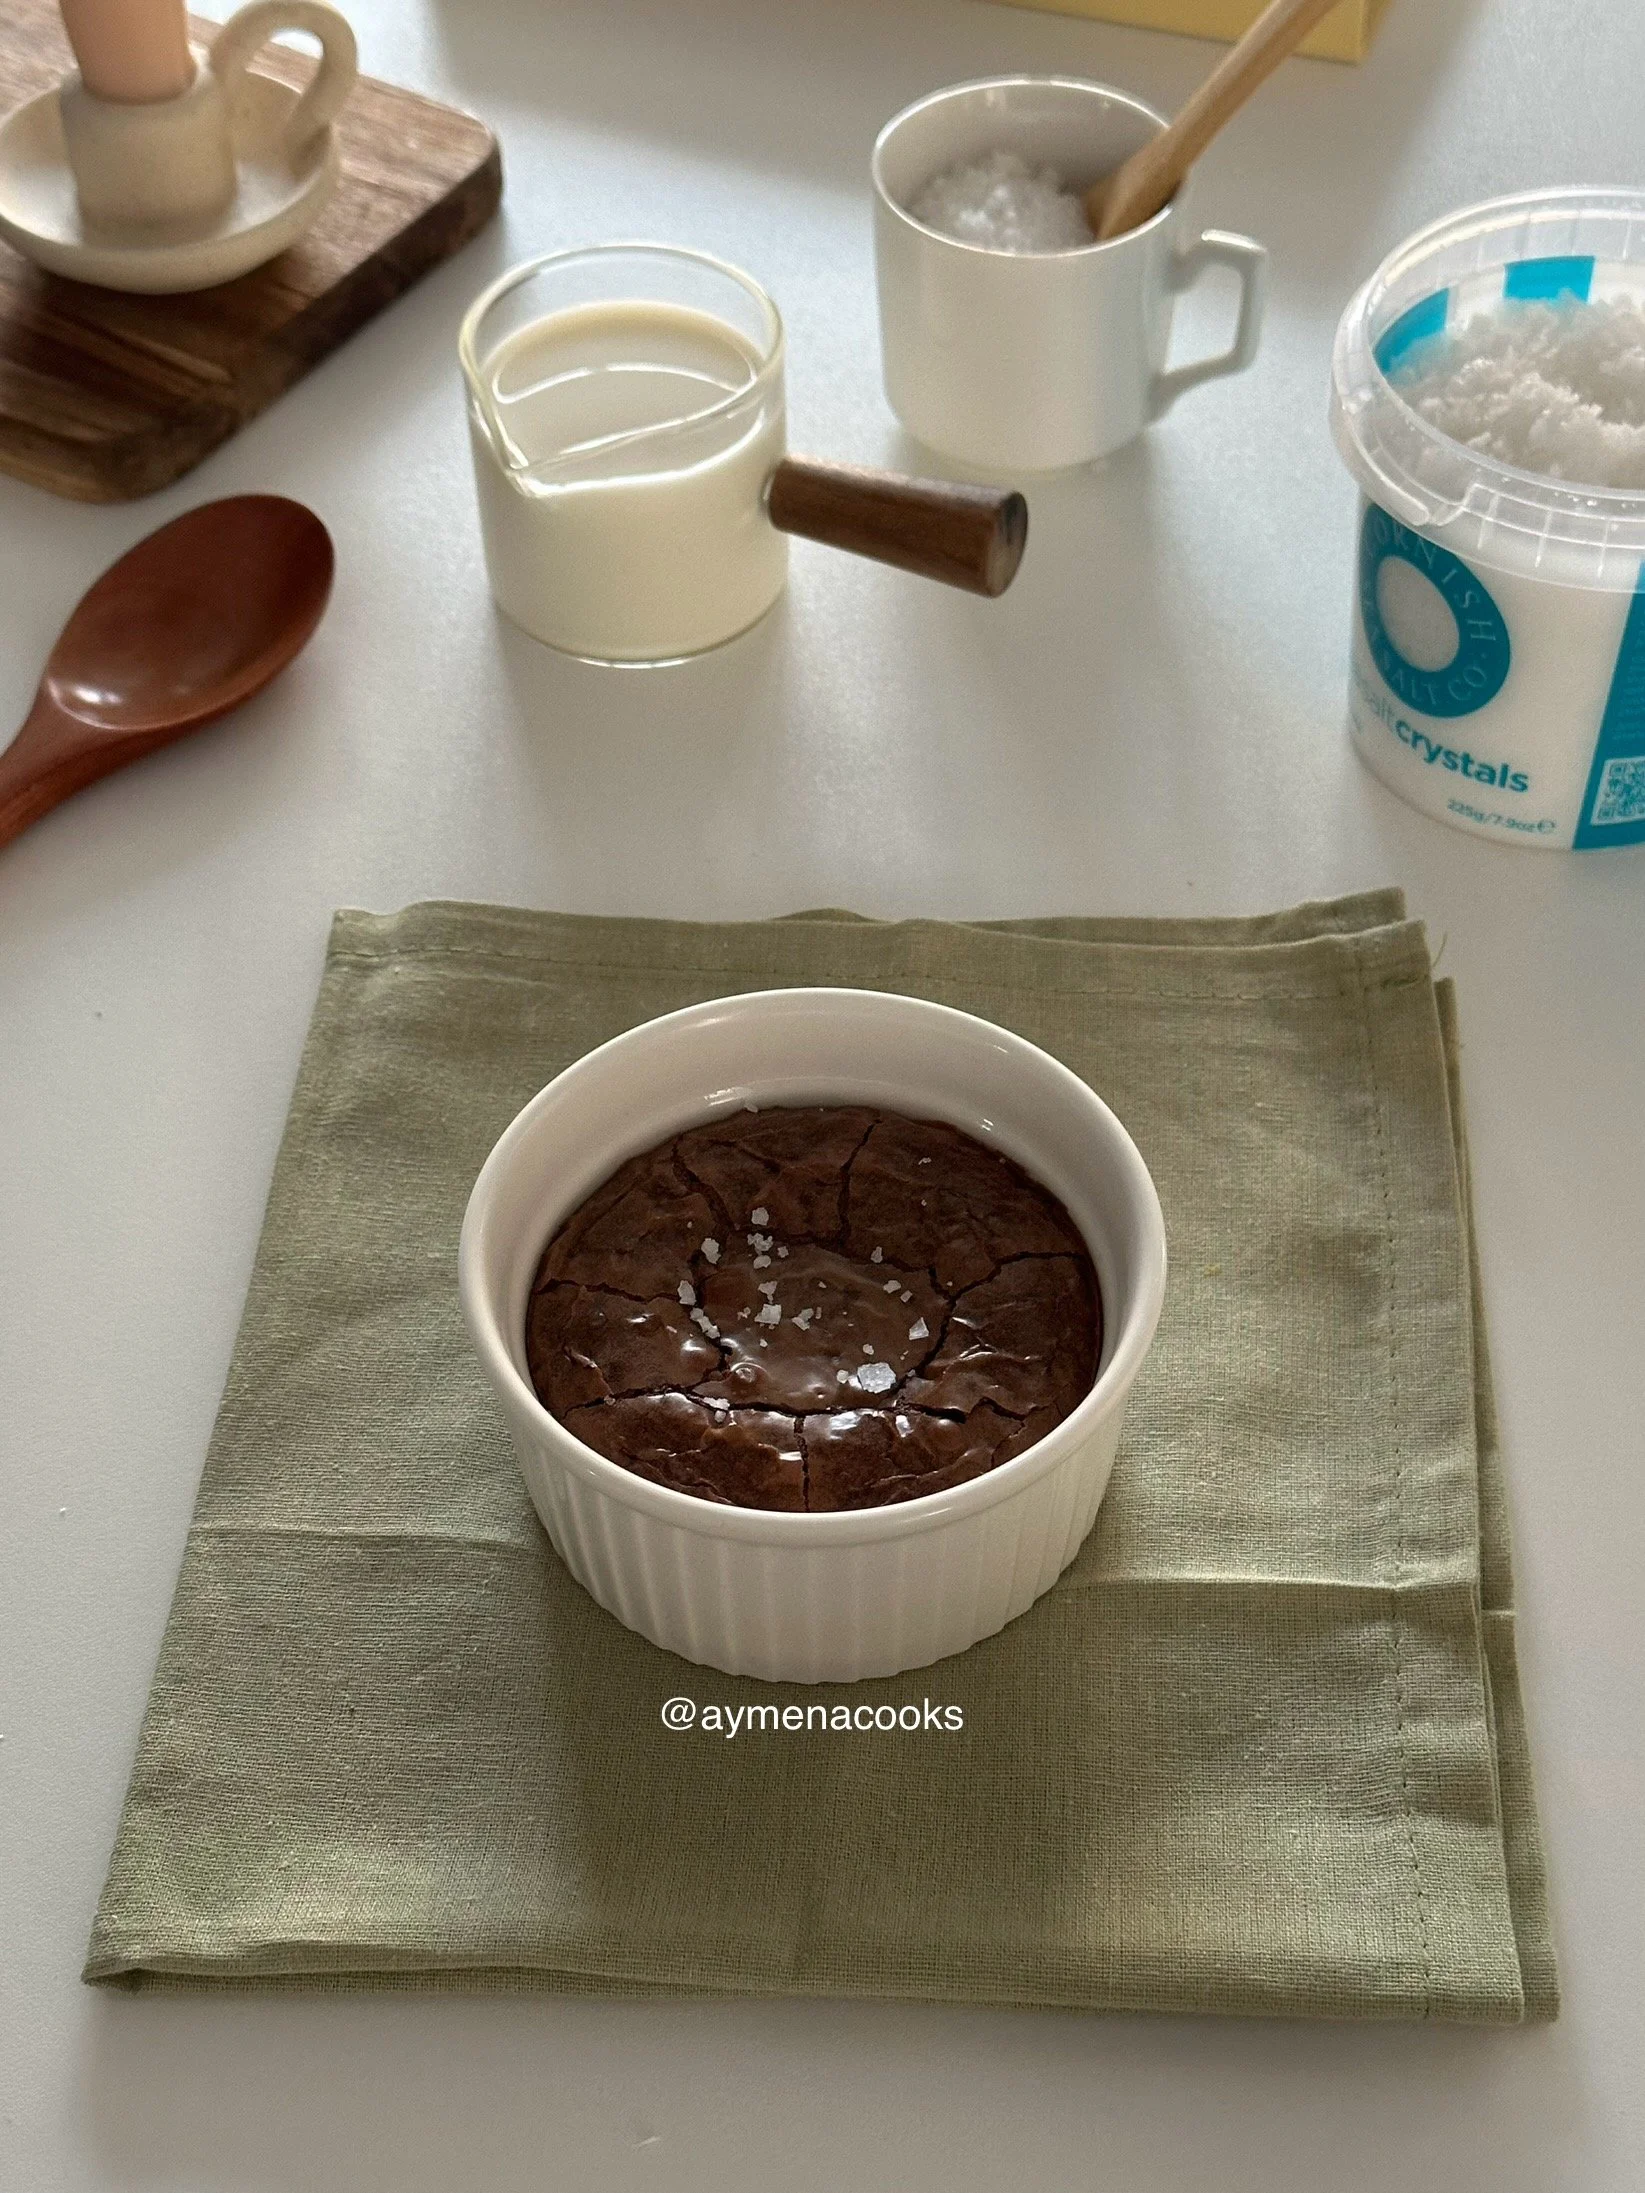
this brownie cups recipe brings you the most perfectly fudgy brownie bites, just enough for two. whether baked in the oven or made in your air fryer, these brownie cups have the best texture, with a delicate crackly top giving way to the fudgiest chocolate centre.
why you will love this brownie cups recipe
-
perfect portion size for one or two – personally, i could probably eat both of these myself, but these brownie cups would be perfect as a quick and easy dessert after dinner for two people! either way, there’s no leftover pan of brownies waiting to be eaten when you make these brownie cups. make this brownie cups dessert when the craving strikes and you just want a brownie or two!
-
air fryer option – these brownie bite cups can be made in the air fryer, which is perfect for those who don’t have access to an oven, or when you don’t feel like heating up the whole oven for two brownies. it’s a little bit more fancy than a microwave mug brownie or mug cake, too!
-
easy recipe – you can make these brownies in a cup using simple ingredients, with a simple process and no fancy tools required. easy to make for any beginner baker who just feels like whipping up a sweet treat!
learn how to make brownie cups for two
this brownie bites recipe is perfect for when you want a quick and easy sweet treat! we’re going to start off by melting dark chocolate and butter together. in another bowl, we‘ll whisk together an egg, brown sugar, granulated sugar and vanilla extra until the mixture becomes pale and fluffy and increases in volume. add the melted chocolate mixture to the egg and sugar mixture and whisk them together until combined. gently fold in flour until you get a thick and chocolatey brownie batter. bake or air fry the brownie in cups until fudgy on the inside with a crackly top. let the brownie cake cups cool completely, and we’re done!
brownie cups ingredients
-
butter – i used salted butter for these brownie mini cups – you are also welcome to use unsalted butter instead, but i would recommend just adding a pinch or two of salt to the brownie batter if you’re using unsalted butter. this will help balance out the sweetness.
-
dark chocolate – i like to melt down dark chocolate with butter for the base of these brownie cups – the dark chocolate provides the perfect balance to the sweetness of the brownie.
-
eggs – this easy brownie cups recipe uses just one large egg.
-
light brown sugar – i like to make this brownie cups recipe with light brown sugar for added flavour, and because the brown sugar helps keep the brownie moist and fudgy.
-
granulated sugar – the brownie cups recipe uses a mix of brown sugar and granulated sugar. we’ll be whisking together the egg and sugars until the sugar dissolves so that we can get that beautiful crackly top!
-
vanilla extract – optional, but a small amount will add a nice, subtle vanilla flavour to your fudgy brownie cups.
-
flour – we’ll be using plain flour or all purpose flour for these chocolate brownie bites.
tools:
-
two small bowls – we’ll need a small heatproof bowl for the butter and dark chocolate mixture. we’ll also need another bowl or jug for the egg and sugars mixture. everything will be added to one bowl at the end, so you’ll want to make sure at least one of the bowls is big enough for all of the brownie mix.
-
whisk or hand mixer – we’re going to mix the sugars and egg together using a whisk or hand mixer until the sugar dissolves. i decided to use a whisk for this recipe. it might take a little longer using a whisk, with a little bit more work and strength, but it will do the job just fine! in fact, using a hand mixer to whip the eggs and sugar actually incorporates more air into the batter, so using a whisk might make your brownie cups even more fudgy.
-
spoon or silicone spatula – we’ll need to gently fold the flour into the brownie cups mix, so you’ll want to use a spoon or spatula for this instead of a whisk. this will just help avoid over mixing.
-
ramekins or any kind of oven safe or air fryer safe dish – i’m using two large ramekins to bake these brownie cups.
-
tinfoil – if making these brownie cups in the air fryer, you’ll need some foil to ensure that the top of the brownie cups don’t cook too quickly.
step by step instructions
for full measurements, keep scrolling down to the recipe below.
step one: if baking these brownie cups in the oven, preheat oven and grease ramekins or any other oven safe dish (air fryer instructions at the end).
step two: break apart some dark chocolate into pieces and add it to a small bowl.
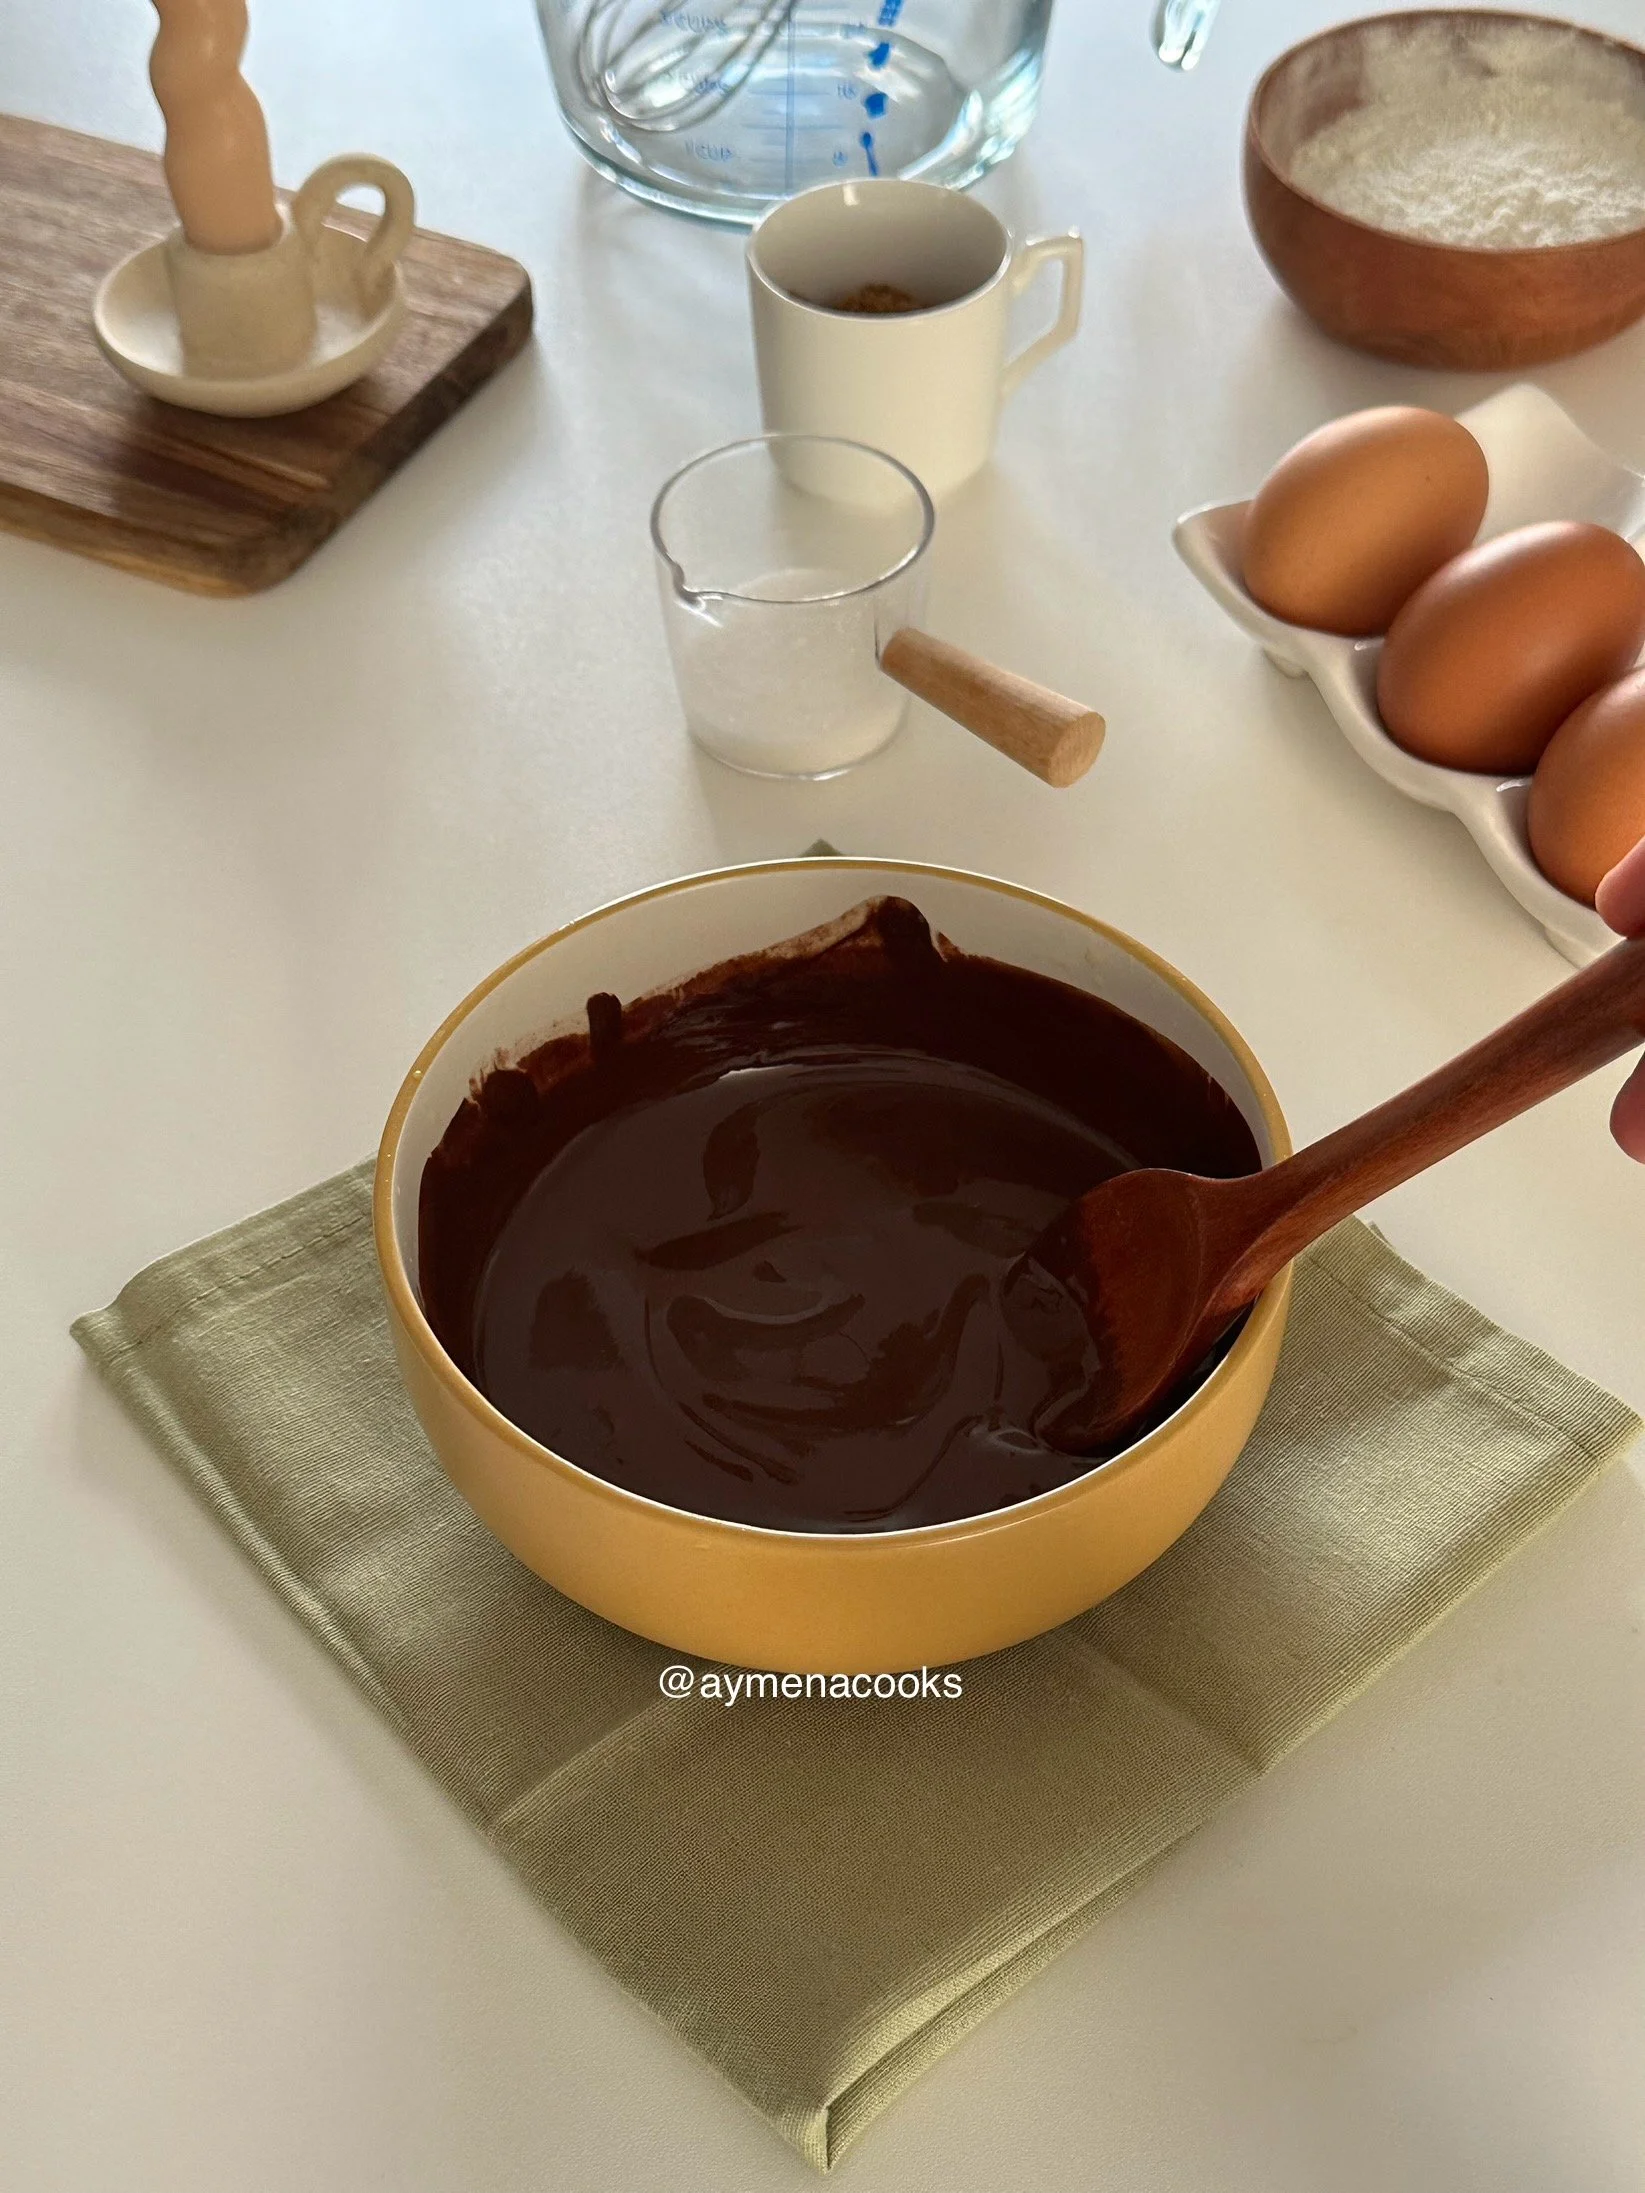
step three: add butter to the same bowl. microwave the mixture in 30 second intervals, stirring every 30 seconds, until mostly melted. then remove the bowl from the microwave and keep mixing the chocolate and butter together until completely combined and smooth.
step four: in another bowl, add 1 large egg. then, add light brown sugar and granulated sugar.
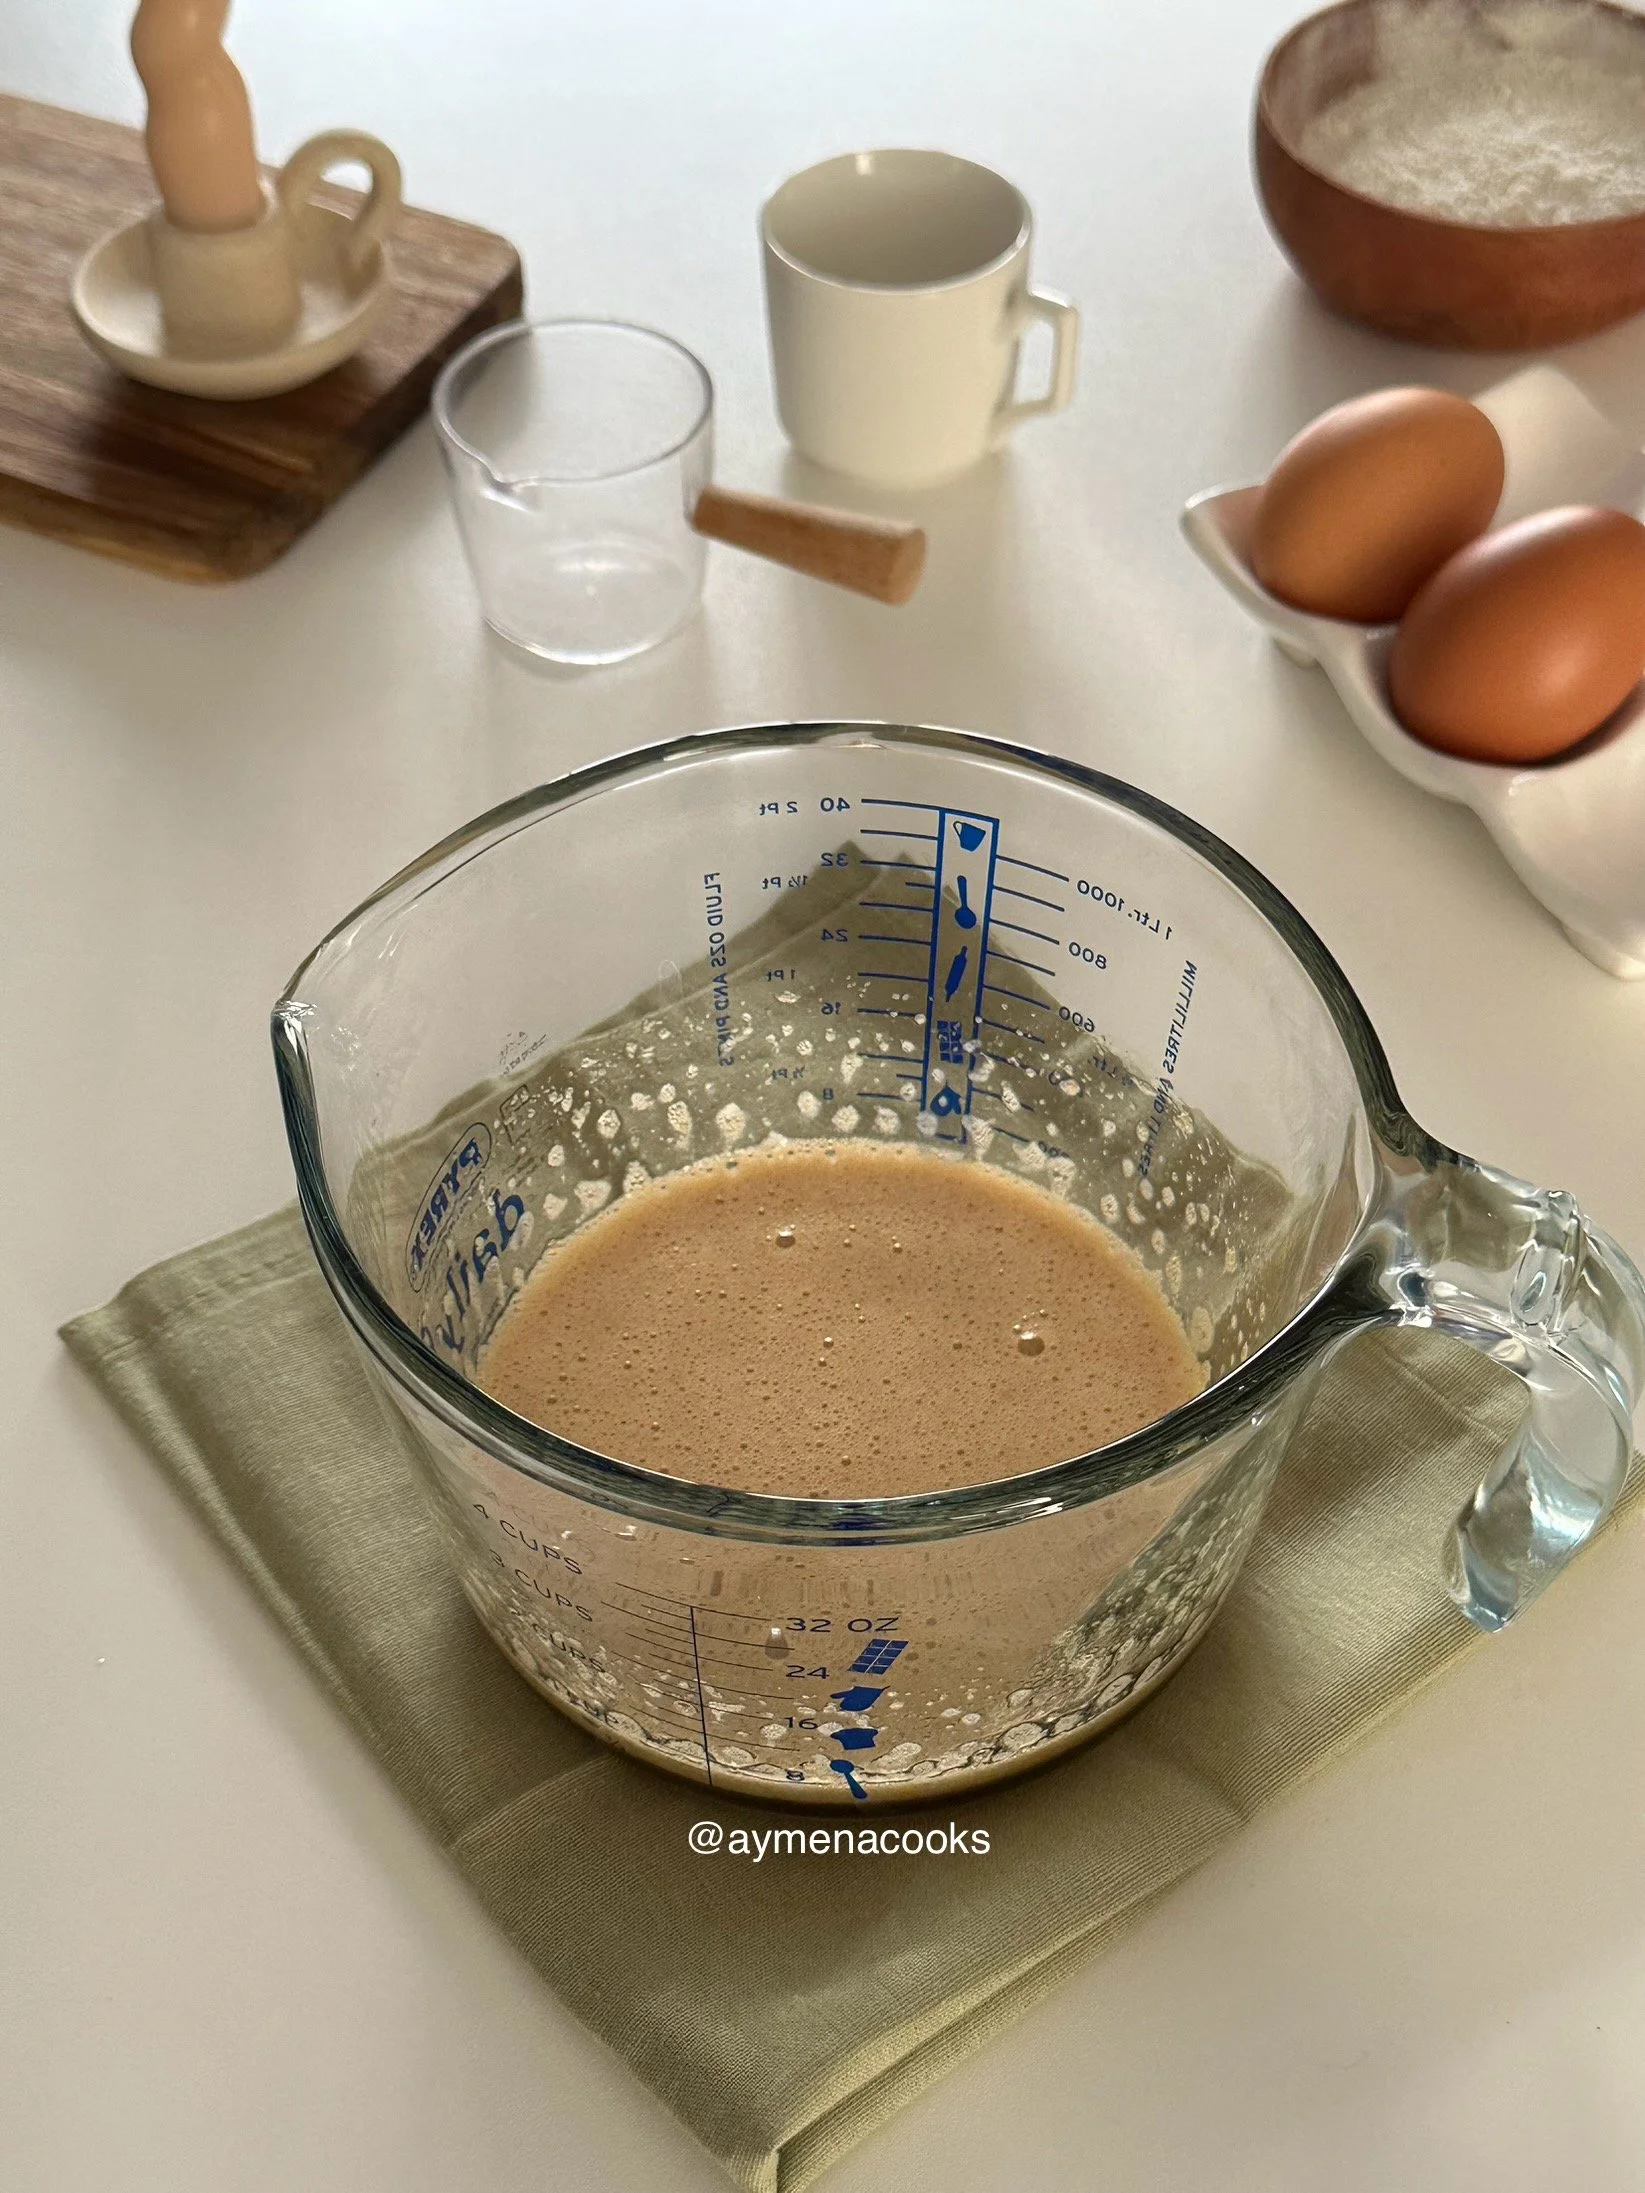
step five: using a whisk or hand mixer, mix together the egg and sugars until they are combined, and the sugar dissolves. the mixture will look pale and frothy. this will usually take a good few minutes. you’ll know the sugar has dissolved once you feel a little bit of the mixture between your fingers and you can no longer feel the sugar granules. if you find that you can still feel them, go ahead and mix for a little bit longer.
step six: add vanilla to the egg and sugar mixture and whisk it in.
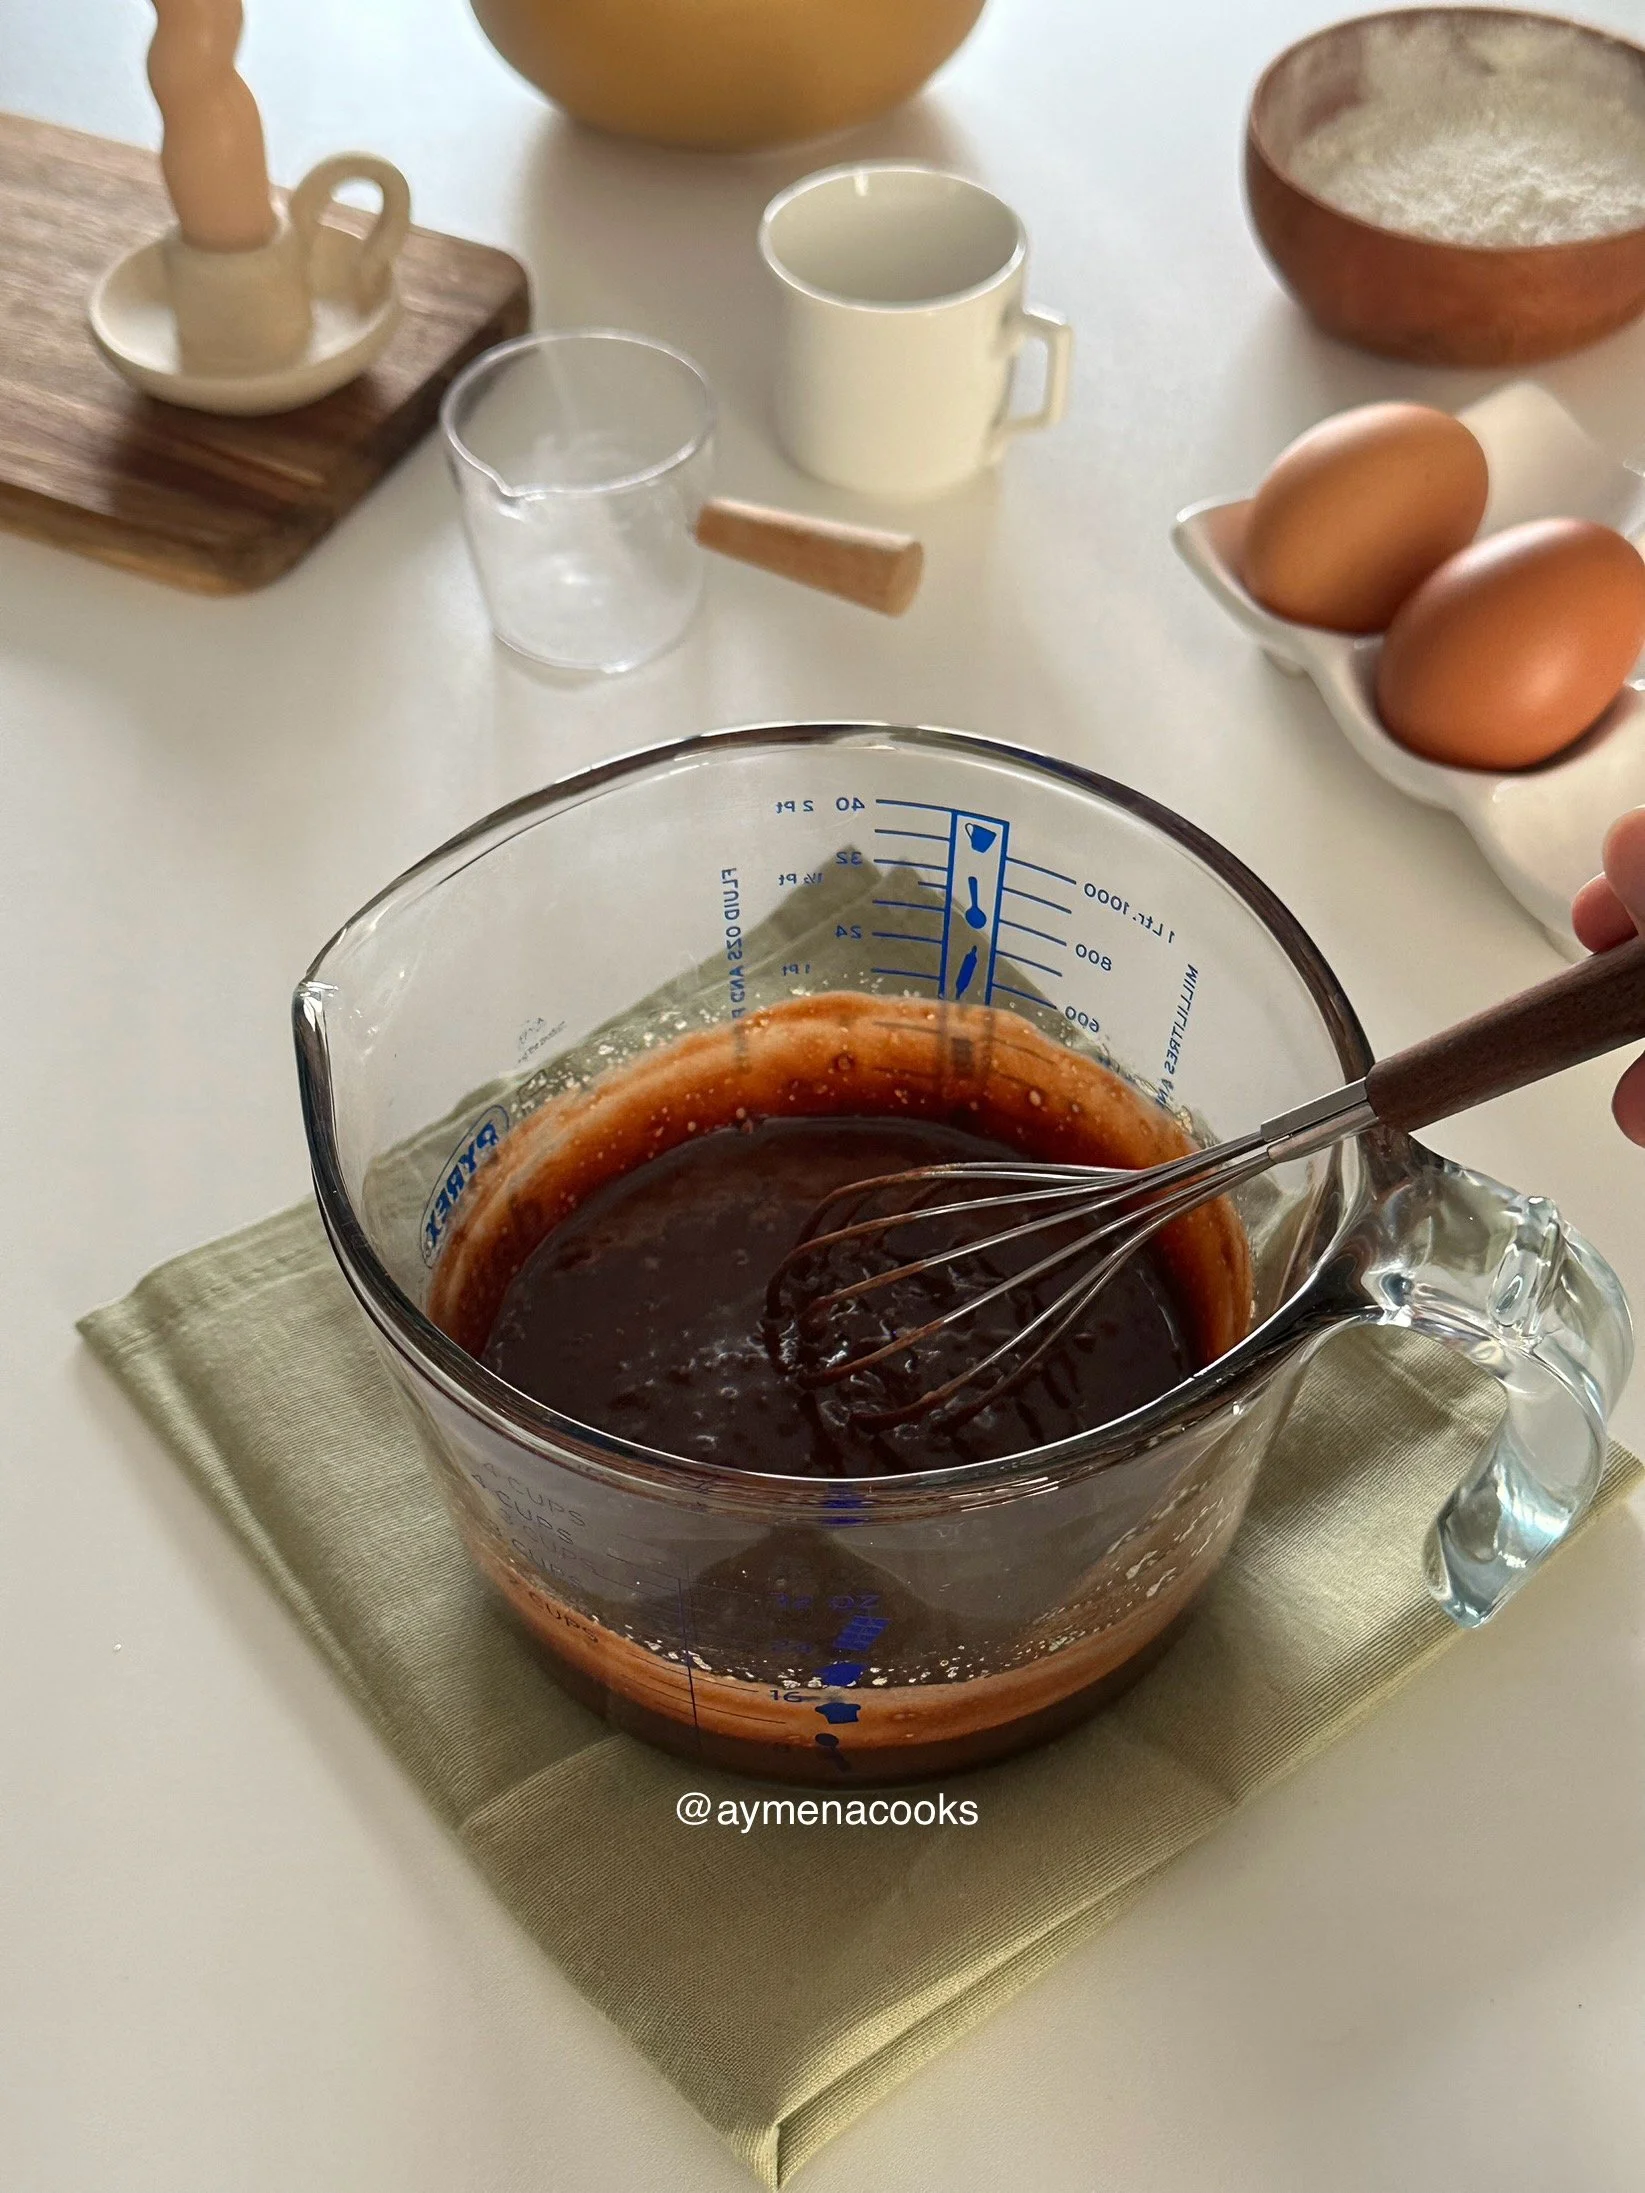
step seven: add the melted chocolate to the egg and sugar mixture. whisk the chocolate into the mixture until combined and the brownie cups mix looks smooth and chocolatey.
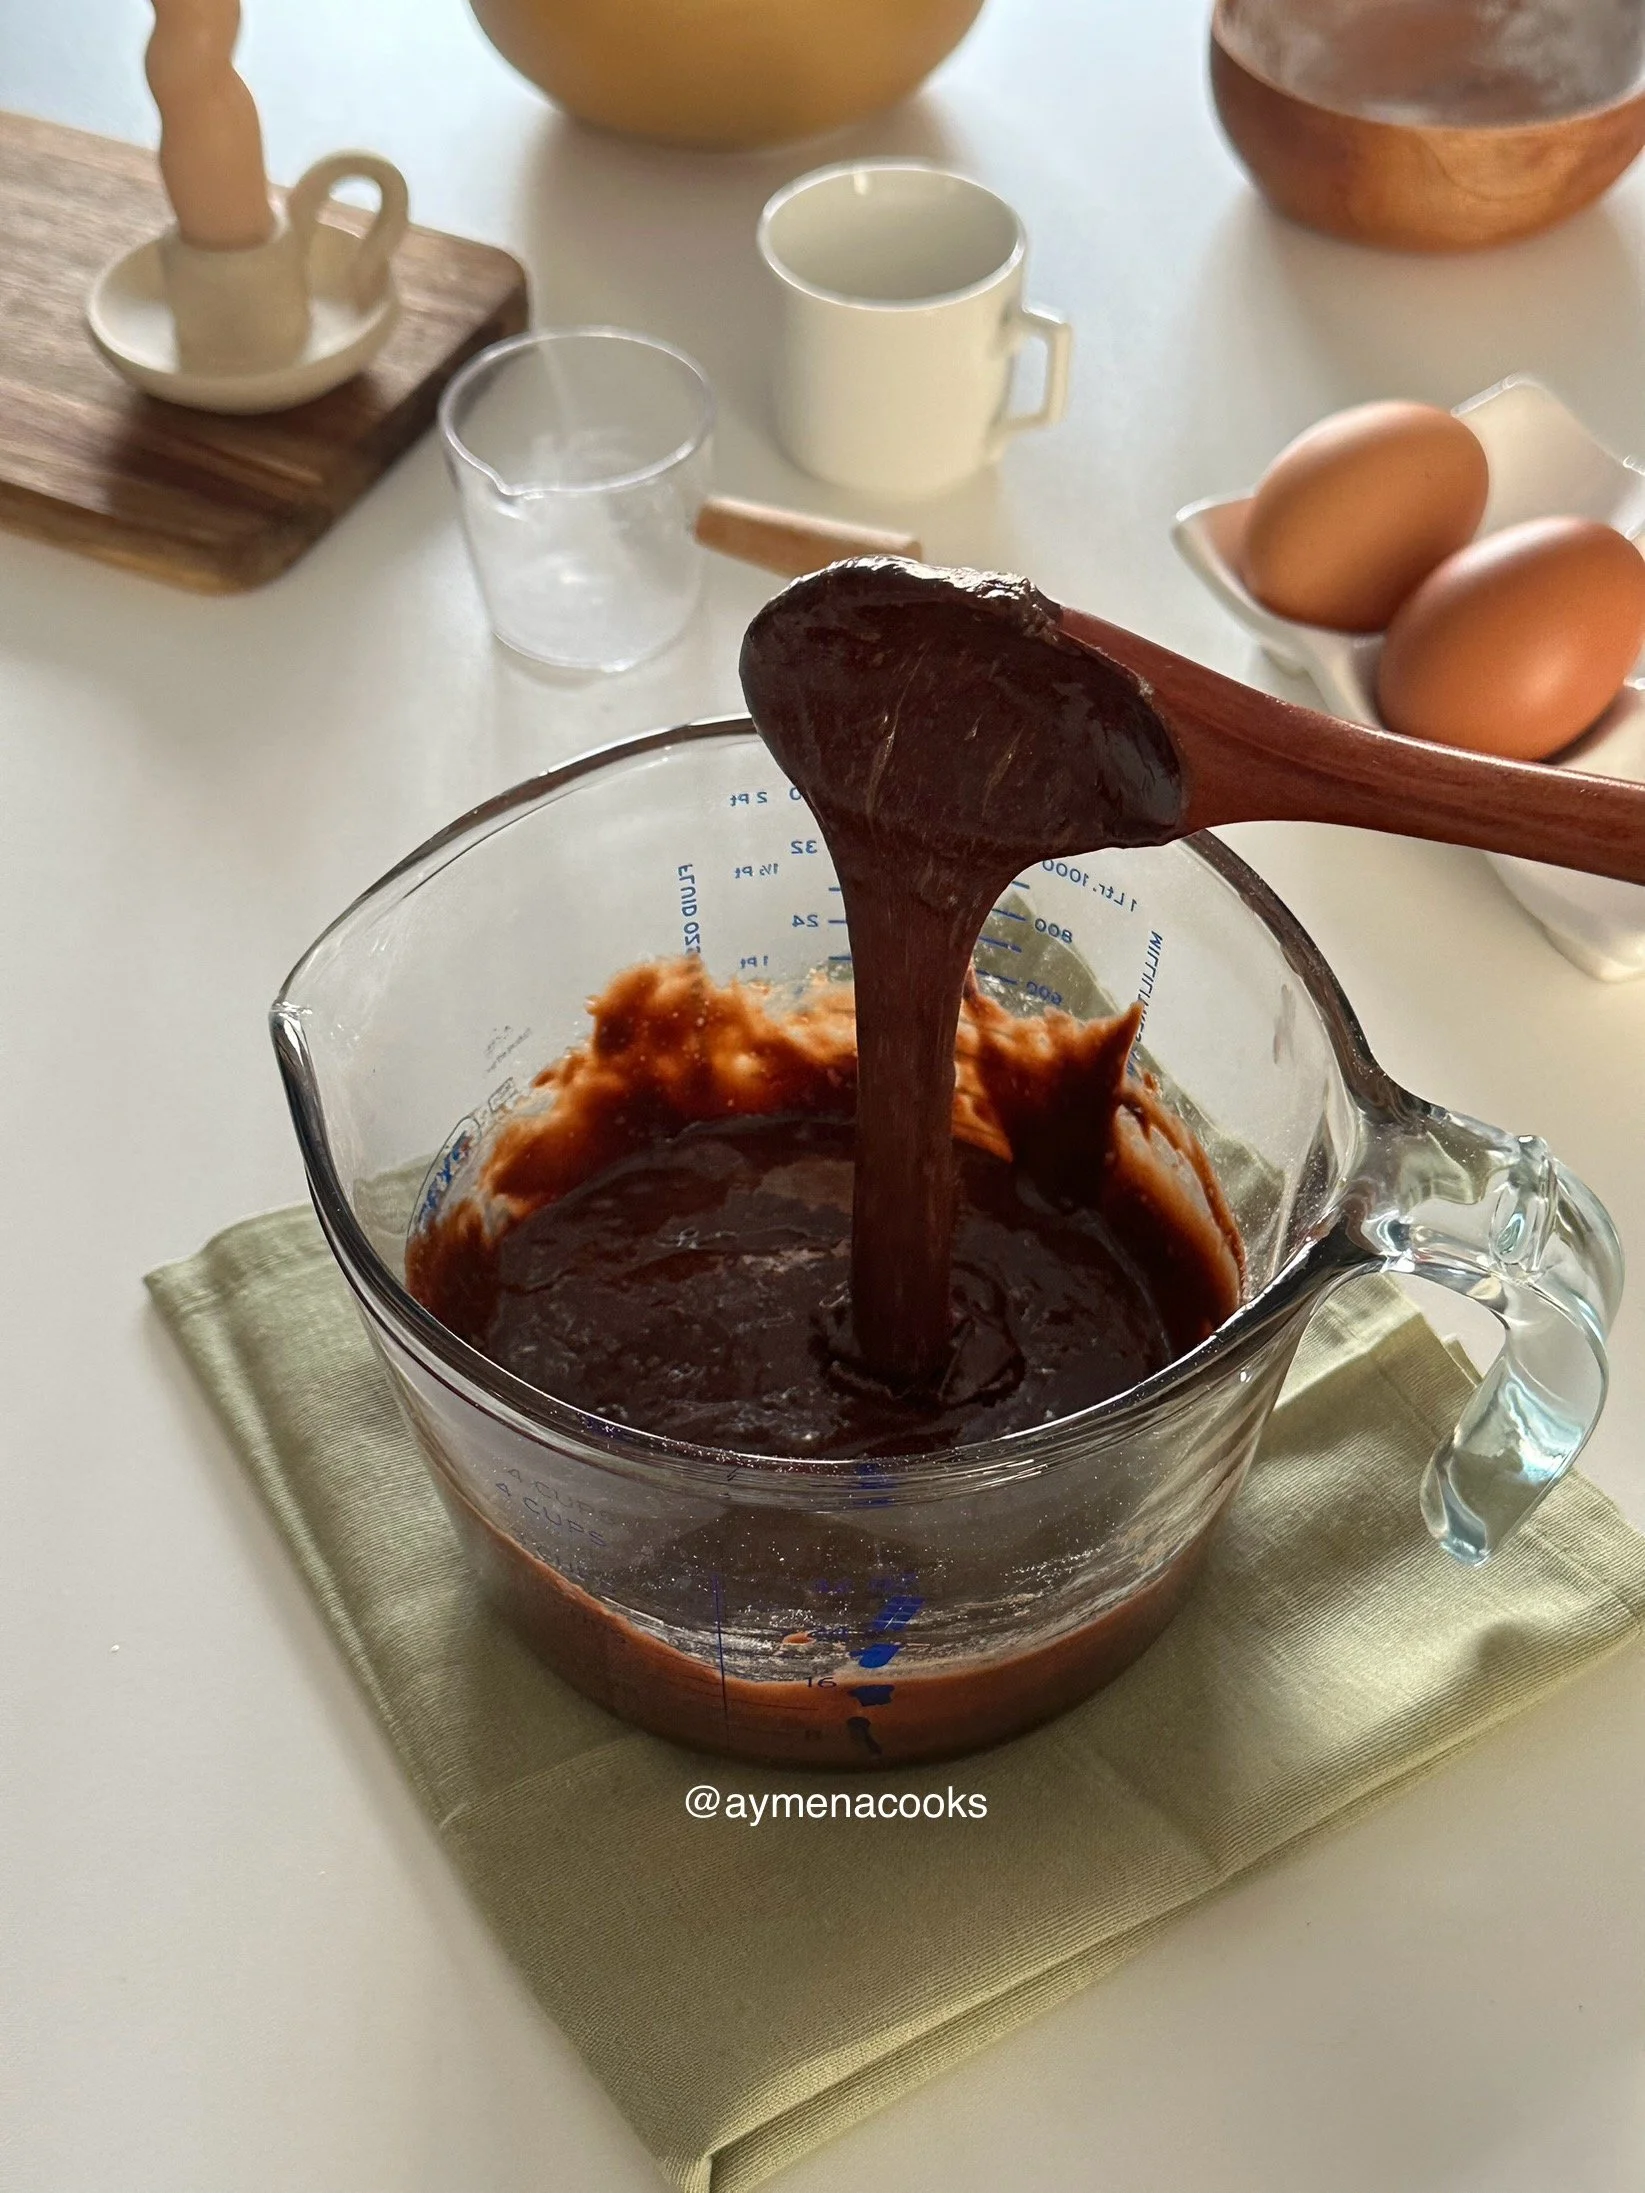
step eight: add flour to the brownie batter. using a spoon or silicone spatula, gently fold the flour into the brownie mix. do not mix too much at this stage as you don’t want to over mix. mix the flour in until just combined, and until there are no longer any visible streaks of flour. the brownie cups mix will look relatively smooth and thick.
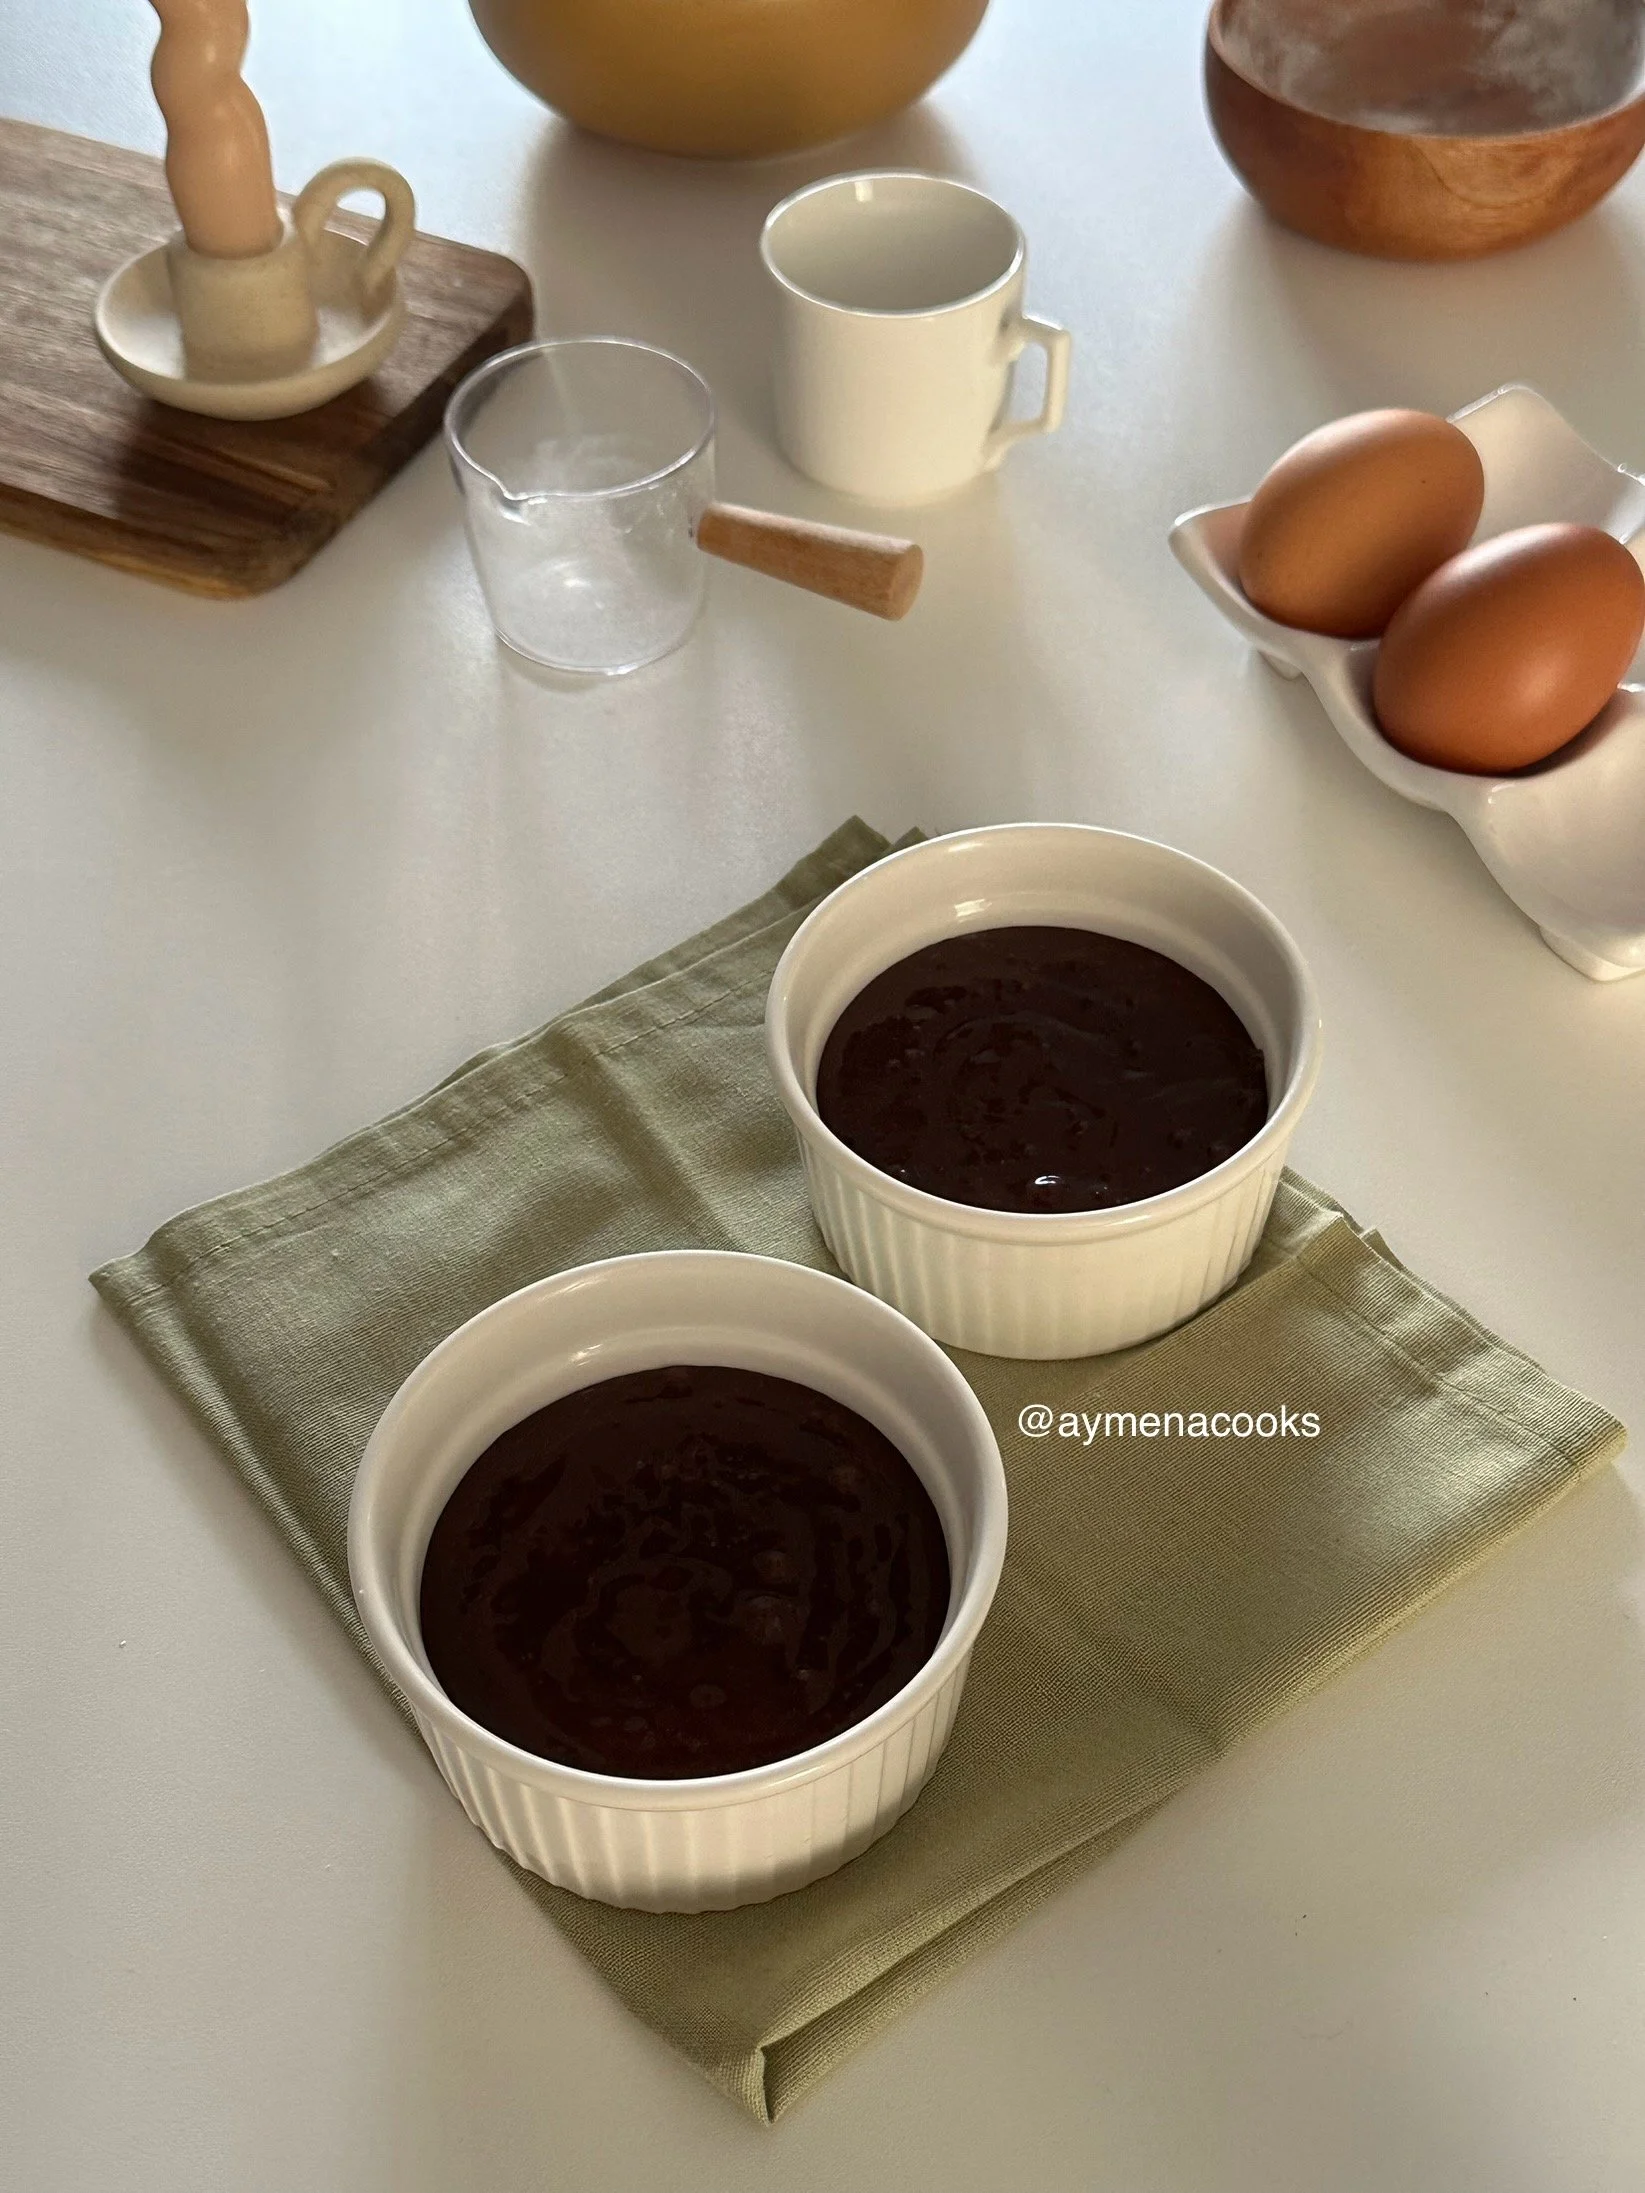
step nine: if baking these brownie cups in the oven, split the brownie batter between your greased ramekins, then place in the oven and bake for about 20-24 minutes (baking times will vary depending on your oven and the size of your dish).
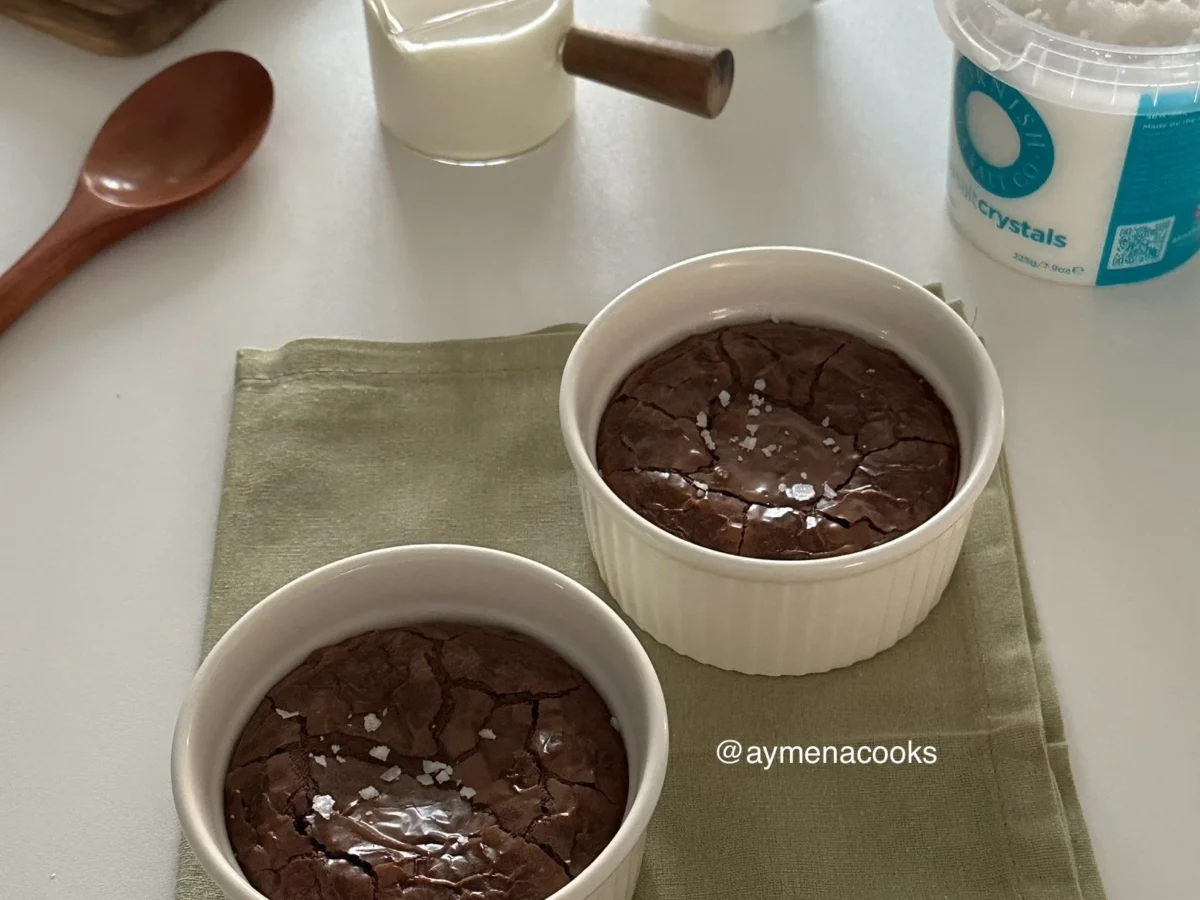
step ten: once you remove the brownie cups from the oven, let them cool completely at room temperature as they will be quite soft and gooey straight out of the oven. they will continue to cook as they cool.
step eleven: once your brownies have cooled completely, serve the brownie cups with ice cream and let’s eat!

step twelve: if making these brownie cups in an air fryer, preheat air fryer before you begin. make the brownie cups mix as stated, then pour the brownie mix into two greased air fryer safe dishes, then air fry for six minutes at the beginning.
step thirteen: at this point, your brownie cups should start forming a crackly top. remove the brownie cups from the air fryer, and cover the top tightly with tinfoil. air fry the brownie cups again for ten minutes.
step fourteen: remove the foil from the brownie cups, turn off the air fryer, and let the brownie cups rest in the hot air fryer for another ten minutes.
step fifteen: remove the brownie cups from the air fryer, and let them cool completely at room temperature as they will be really soft and gooey straight out of the air fryer, and will continue to cook as they cool.
step sixteen: once the brownie cups have cooled completely, serve with ice cream and let’s eat!
tips and notes
-
if using unsalted butter, add a pinch or two of salt to the brownie batter along with the dry ingredients.
-
try to use high quality chocolate if you can. high quality dark chocolate or semi sweet chocolate will give these chocolate brownie cups the best rich and chocolatey flavour. higher quality chocolate will also be easier to melt and combine with the rest of the ingredients.
-
be careful not to over mix the batter. once you add the flour, make sure to gently fold it in using a spoon or silicone spatula, and don’t mix for longer than necessary. over mixing can lead to a tough brownie. we want these brownie cups to be soft and fudgy.
-
make sure to use a room temperature egg, as it will combine with the rest of the ingredients easily and give you a smoother brownie batter. i’d recommend leaving the egg out at room temperature about 30 minutes before baking these brownie cups.
-
make sure you preheat the oven or air fryer so that it’s already hot by the time you’re ready to bake or air fry these brownie cups. this will ensure that the brownies bake evenly and that they won’t take longer to bake.
-
adjust baking time as needed. every oven is different, so i recommend keeping an eye on your brownie cups as they bake. don’t just bang it in the oven and leave until the designated time is up. it might be a good idea to check your brownie cups for doneness a few minutes before the recommended baking time. i like to take the brownie cups out of the oven when they’re slightly underdone as they will continue to cook as they cool once they’re out of the oven or air fryer. over baking will result in dry and cakey brownies, which is not what we want.
-
air fryers also tend to vary in strength, so be sure to check on your brownie cups in the air fryer every once in a while to ensure that they aren’t over baked or burning.
-
once your brownie cups are out of the oven, they might be a bit soft and gooey. let them at room temperature before eating so that they can firm up a bit. you can even plACE them IN THE FRIDGE FOR A WHILE IF YOU WANT TO SPEED UP THE COOLING PROCESS.
-
when baking, place the ramekins on the middle rack with top and bottom heat. when air frying, place your dish in the middle of the air fryer basket. this will just ensure that the brownie cups bake evenly.
-
use a kitchen scale to measure your ingredients. while i add both metric and cup measurements for this brownie cups recipe, i always recommend using a kitchen scale to weigh out your ingredients for most accurate results.
-
if you decide to make these brownie cups in the air fryer, make sure you don’t skip the tinfoil step – covering the brownie with tinfoil ensures that the top doesn’t over bake or burn, and allows the middle to bake and set properly. make sure the foil is sealed tightly over the dish, as you don’t want it to fly off in the air fryer.
-
make sure you also keep the brownie cups in the air fryer for ten minutes after turning the air fryer off. the residual heat will help the brownie set properly so that it’s not raw in the middle, and there’s less risk of over baking this way.
frequently asked questions
-
can i use unsalted butter in this single serve brownie recipe ?
– yes, you can use unsalted butter. if you use unsalted butter for this brownie cups recipe instead of salted, i would recommend adding an extra pinch or two of salt to the batter.
-
do i have to use vanilla extract to make these brownie cups ?
– the vanilla in this brownie cups recipe is optional. just a small amount of it gives these brownie cups a nice, subtle vanilla flavour, but if you would prefer not to use it or don’t have it, that’s also completely fine.
-
can i make these brownie cups with oil ?
– i prefer making these brownie cups with butter for the best flavour, but if you’d rather make these brownie cups without butter, and would rather use oil instead, that should also work.
-
why did my brownie cups turn into cakes instead of fudgy ?
– there are a number of reasons why your brownie cups came out cakey. one reason is baking times. you should take your brownie cups out of the oven or air fryer when they are slightly underdone as they will continue to cook and firm up as they cool. even if you followed the exact timings in the recipe, every oven and air fryer will vary in terms of baking times. the size and depth of your baking dish also has an impact on baking times, so you should really keep an eye on your brownie cups and adjust accordingly. brownie cups made in a smaller dish will take less time to bake and brownie cups in a bigger dish will take more time to bake. i highly recommend checking on your brownie cups every once in a while, especially towards the end of the written times to make sure they don’t over bake.
– another reason could be due to over mixing the batter or having too much flour in your brownie batter. to make these brownie cups as accurately as possible, be sure to weigh out the flour using a kitchen scale. i also add cup measurements to my recipes, which use a higher than typical conversion for the flour since it goes by scooping the flour (as this is what most people do). gently fold the flour into the brownie batter until no streaks of flour remain in order to avoid over mixing.
-
can i make these brownie cups with milk chocolate instead of dark chocolate ?
– while you can use whatever chocolate you like to make these brownie cups, i would recommend using dark or semi sweet chocolate in the actual brownie batter to balance out the sweetness and give these brownies a richer flavour. using something like milk chocolate in the batter might make the brownies too sweet.
-
can i make these brownie cups with no brown sugar ?
– a mix of brown sugar and granulated sugar is recommended for these brownie cups, as the brown sugar adds moisture, helps gives the brownies a richer flavour and makes them extra chewy. however, if you don’t have brown sugar, you can substitute it with granulated sugar. using all granulated sugar for this brownie cups recipe might change the taste and texture of these brownies slightly, but they will still be delicious! for best results, use a combination of brown sugar and granulated sugar as stated.
-
can i make this as a brownie mug recipe instead of using ramekins or a baking dish ?
– since these brownie cups are baked in the oven or air fryer, you’ll need to use an oven-safe or air fryer-safe dish to make these brownie cups.
-
can i make these brownie cups ahead of time ?
– i would really recommend baking these brownie cups fresh so that they can be enjoyed while they’re still gooey and fudgy. while the brownie cups will stay fudgy even the next day, their taste and texture is best when baked fresh!
-
why do i need to cover the brownie cups with foil in the air fryer ?
– the air fryer method is a little different to the oven method, as we want to make sure we get that crackly top while still getting that gooey, fudgy centre. the foil on the top prevents the top from drying out or burning, while ensuring that the middle cooks through.
-
why did my brownie cups sink in the middle ?
– it’s completely normal for your brownie cups to sink slightly, since the centre stays fudgy and the edges are set.
-
can i make these brownie cups with box mix ?
– you could definitely make these brownie cups from box mix if you wanted to. however, this recipe is specifically made to make one large single serve brownie or two brownie cups with simple ingredients that you probably already have at home! making two brownie bites using box mix would require different liquid ratios and different baking times. to keep these brownie bites easy, i would recommend just using the brownie cup measurements stated in this recipe.
-
can i make brownie oreo cups ?
– yes, you definitely can! feel free to add an oreo in the middle of these brownie cups and top with more brownie batter before baking for brownie oreo cups.
-
can i make these brownie cups with filling inside ?
– yes, you can. you can make these with any kind of filling you like. some great options would be brownie cups with cheesecake filling or brownie cups with peanut butter filling – just add a layer of the brownie batter in your dish or ramken, top with a cream cheese or peanut butter filling and swirl it through, and top with more brownie batter. you could also make s’mores brownie cups by adding graham crackers and marshmallows!
-
can i make these brownie cups in a muffin pan ?
– absolutely! just bear in mind that making these brownie bites using a mini muffin pan will give you more than two brownies. it’ll also mean that you’ll need to reduce baking times.
-
can i make these brownie cups with cocoa powder ?
– i like to make these brownie cups without cocoa powder as i find that using just chocolate gives you an extra rich and fudgy brownie. to keep these brownie cups extra dense and gooey, i would recommend using chocolate instead of cocoa powder in this recipe.
recipe
brownie cups for two
this brownie cups recipe brings you the most perfectly fudgy brownie bites, just enough for two. whether baked in the oven or made in your air fryer, these brownie cups have the best texture, with a delicate crackly top giving way to the fudgiest chocolatecentre.
- 10 minsprep
- 24 minscook
- 1-2servings
ingredients
7 ingredients- 35g butter, salted (2 tbsps + 2 tsps)
- 80g dark chocolate (1/4 cup + 3 tbsps chocolate chips)
- 1 large egg, room temperature
- 30g light brown sugar (2 tbsps + 1 tsp)
- 25g granulated sugar (2 tbsps)
- 1/4 tsp vanilla extract
- 35g plain flour or all purpose flour (3 tbsps + 1 tsp)
method
20 stepsoven instructions
- preheat oven to 180 °C (350°F) and grease two ramekins or small baking dishes.
- break apart some dark chocolate into smaller pieces and add it to a small bowl.
- add butter to the same bowl. microwave the mixture in 30 second intervals, stirring every 30 seconds, until mostly melted. then, remove the bowl from the microwave and keep mixing the chocolate and butter together until completely combined and melted. set this aside.
- in another bowl, add the egg, light brown sugar and granulated sugar.
- using a whisk or hand mixer, mix together the egg and the sugars until they are combined, and the sugar dissolves. the mixture will look pale, thick and frothy. this will usually take a good few minutes. you'll know the sugar has dissolved once you feel a little bit of the mixture between your fingers and you can no longer feel the sugar granules. if you find that you can still feel them, go ahead and mix for a little bit longer.
- add vanilla extract to the egg and sugar mixture and just whisk it through.
- add the melted chocolate mixture to the egg and sugar mixture. whisk the mixture until combined and the brownie batter looks smooth and chocolatey.
- add flour to the brownie batter. using a spoon or silicone spatula, gently fold the flour into the batter. do not mix too much at this stage. mix the flour in until just combined, and until there are no longer any visible streaks of flour. you should have a thick and smooth batter.
- split the brownie batter between your greased ramekins, then place in the oven and bake for about 20-24 minutes (baking times will vary depending on your oven and the size and depth of your dish).
- once you remove the brownie cups from the oven, let them cool at room temperature as they will be quite soft and gooey straight out of the oven, and will continue to cook as they cool.
- once the brownie cups have cooled, serve with ice cream and let's eat!
air fryer instructions
- preheat air fryer to 165 °C (325°F) and grease two small air fryer safe dishes.
- make the brownie batter as stated in the recipe.
- split the brownie batter between the air fryer safe dishes, and place the dishes in the centre of the air fryer basket.
- air fry the brownie cups at 165 °C (325°F) for 6 minutes.
- remove the brownie cups from the air fryer. cover the top of the cups tightly with tinfoil. make sure the foil is not too long or loose over the cups.
- with the foil over the top of the cups, place the cups back in the air fryer, and air fry again at 1 65 °C (325°F) for 10 minutes.
- remove the tinfoil from the brownie cups, and turn the air fryer off. let the brownie cups rest in the hot air fryer for another ten minutes. r
- remove the brownie cups from the air fryer, and let them cool at room temperature as they will be quite soft and gooey straight out of the air fryer, and will continue to cook as they cool.
- once the brownie cups have cooled, serve with ice cream and let's eat!
I’ve never seen such a detailed dessert recipe! I just discovered your page and I love it. I’ll be checking out all your recipes from now on!!
thank you so much!! <3